
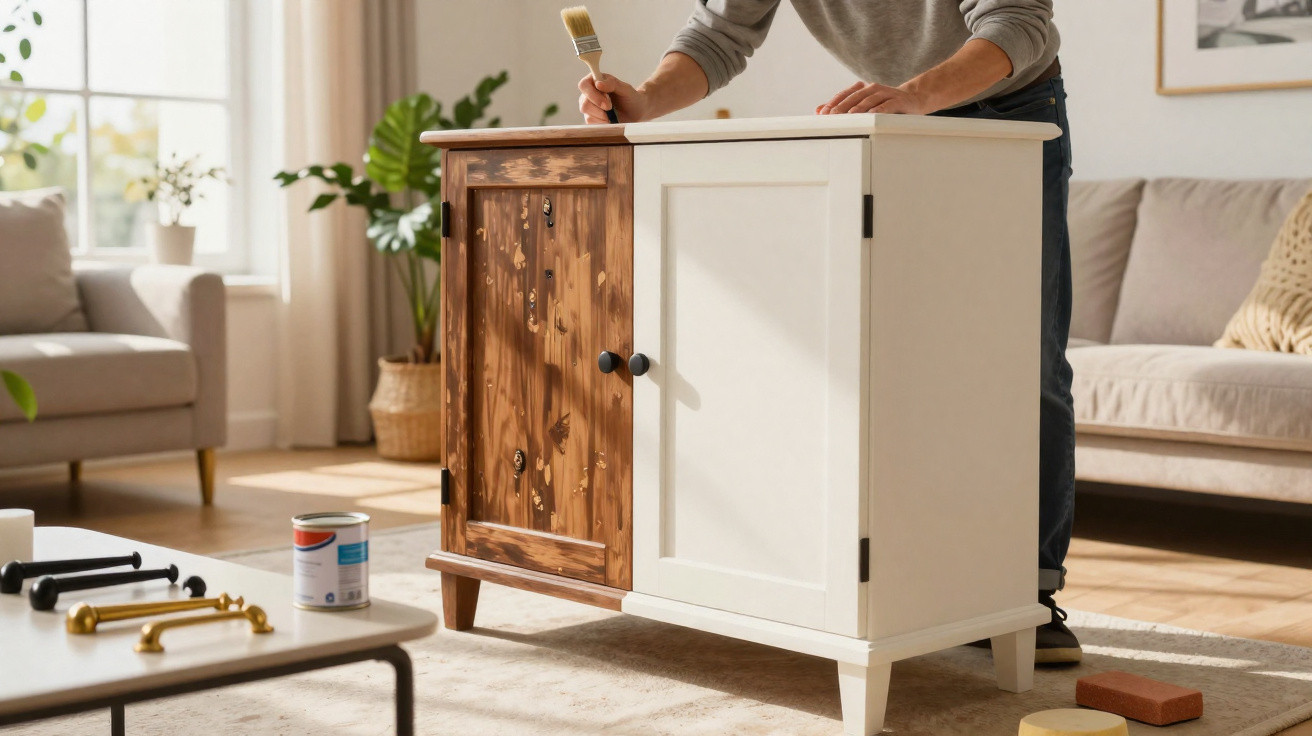
Many people feel attached to long‑standing family furniture, yet get annoyed every day by how heavy and dated it makes a room feel. Rather than throwing out a solid sideboard cabinet or swapping it for cheap replacements, there’s a straightforward approach that turns these pieces into real statement items with little money and a manageable amount of work.
Why old furniture doesn’t belong in bulky waste
A large, dark solid‑wood wardrobe, an ornate chest of drawers, or a weighty dining‑room dresser: countless homes have pieces exactly like these. They’re sturdy and full of history-yet visually they often clash with pale parquet flooring, simple sofas and minimalist décor.
"Anyone who modernises an old piece of furniture saves money, conserves resources and keeps a piece of family history-just with a new look."
Instead of buying new, more and more interior fans are opting for a transformation. The idea is simple:
- The characterful carcass stays.
- Paint and hardware are completely rethought.
- Afterwards, the piece sits in the room like a current designer item.
Cost is a major driver. For primer, paint, a sanding sponge, masking/protective materials and new handles, you’re typically looking at roughly €30 to €100-depending on size and condition. A comparable new solid‑wood piece can easily cost five to ten times as much.
There’s also the emotional side: many wardrobes and chests once stood at grandparents’ homes or were bought as a wedding gift. Rather than letting those memories go, a fresh coat of paint and new handles allow them to fit naturally into a modern living scheme.
The most important preparations before the first brushstroke
The real “secret” isn’t the colour-it’s the prep. Cut corners here and you’ll end up with peeling patches or flaws you can still see after painting.
Clean thoroughly instead of painting straight over
First job: clean. Old polish residue, greasy marks from hands and a thick layer of dust often sit invisibly on the surface. They stop primer and paint from bonding properly.
- Open all doors and pull drawers out.
- Wipe everything down with a mild cleaner or a dedicated degreaser.
- Pay extra attention to edges, handle areas and mouldings.
- Then wipe dry and let it dry out completely.
After that, it’s worth protecting the floor all around with plastic sheeting or a decorator’s dust sheet. Add masking tape to nearby walls and skirting boards too, so paint splashes don’t become a later irritation.
Remove hardware and check for weak points
Before painting, unscrew all handles, knobs and key plates. That way you can reach every corner and avoid ugly paint ridges around fittings. It’s also the moment when you notice if drawers stick, hinges wobble or there are cracks in the timber.
Minor damage can be filled with wood filler before priming. Once it’s dry, a sanding sponge creates smooth transitions. Spending this quarter of an hour pays off with a noticeably more premium finish.
The primer: the unsung hero of the whole project
Many DIYers want to jump straight to the coloured coat. That’s exactly where the difference between a professional result and a frustrating one shows up. The right primer is crucial-especially with old, dark woods or previously varnished surfaces.
"A good primer saves working time, covers old colours and turns a blotchy cabinet into a perfect canvas."
Apply the primer thinly but evenly using a roller and brush. The key is to cover every visible area, including the inner edges of doors and the fronts of drawers. Then allow enough drying time. If you move on to paint too soon, you risk a tacky finish and weaker adhesion.
How dark and heavy becomes light and modern
Choosing the right colour
Rather than loud shades, many DIY pros choose pale, calm tones for inherited pieces. Creamy white, warm beige or soft greys instantly make a room feel lighter. They visually “shrink” big, dark cabinets and work with almost any floor or sofa.
A water‑based, satin (silk‑matt) wood paint is well suited here. It smells less, dries relatively quickly and is easy to control with roller and brush.
Work in thin layers
Instead of one thick coat, two to three thin coats are the better option. In practice, the order looks like this:
- Apply the first thin coat on large areas with a foam roller.
- Use a small paintbrush for edges, mouldings and corners.
- Let it dry fully.
- Apply a second coat and allow it to dry again.
- If the wood is very dark, add a third, very thin coat.
Small runs can be corrected while you’re painting, using a slightly damp cloth and a little thinner. Ideally, keep doors slightly ajar while painting so they don’t end up sticking together.
Handles, details, care: how the piece really looks new
Paint changes the character; hardware defines the style. This is where it becomes clear whether the piece feels Scandinavian, elegant or industrial.
Set the design with new handles
Gold‑coloured knobs on a light carcass add a refined touch, black bar handles suit modern loft interiors, and leather pulls feel warm and handcrafted. If you want to keep the original fittings, you can refresh them with a matt gold or black spray.
| Handle type | Effect | Suitable style |
|---|---|---|
| Matt gold knobs | Elegant, slightly glamorous | Modern Classic, Boho |
| Black bar handles | Clean, graphic | Industrial, Minimal |
| Leather handles | Warm, homely | Scandi, Country |
After the final paint coat, add a protective layer of clear varnish or wax, depending on the sheen you want. This helps guard against scratches, stains and moisture. Clean later with a soft cloth and a mild cleaner to keep the surface looking good for a long time.
Common mistakes that are easy to avoid
When you refurbish a large piece of furniture for the first time, the same errors crop up again and again. Three points are especially common:
- Not cleaning enough: grease and dust lead to peeling.
- Coats that are too thick: runs form and doors stick.
- Not allowing drying time: impatience leaves fingerprints and dents.
Patience pays off: it’s better to plan an extra day than to shake your head every time you walk past the cabinet.
How to combine the trend with other home ideas
This method isn’t only for one large heirloom. Smaller side tables, bedside units or old chairs can be tackled using the same steps. If you stick to one consistent colour, you create a visual thread through the home without having to buy everything new.
There’s another side effect: once you’ve seen how dramatically an old piece can change, you look very differently at yellowed chests of drawers and little cabinets at the next flea market. With a bit of imagination, you can already see the future, bright statement piece beneath the dark varnish-ready for your own hallway.
Over time, you end up with a home that doesn’t look like a catalogue, but like personality. Each piece tells a story, yet still feels modern and practical for everyday life. That combination of emotion, sustainability and style is exactly what makes furniture reloving so appealing-and finally brings gran’s cabinet out of its dusty corner.
Comments
No comments yet. Be the first to comment!
Leave a Comment