
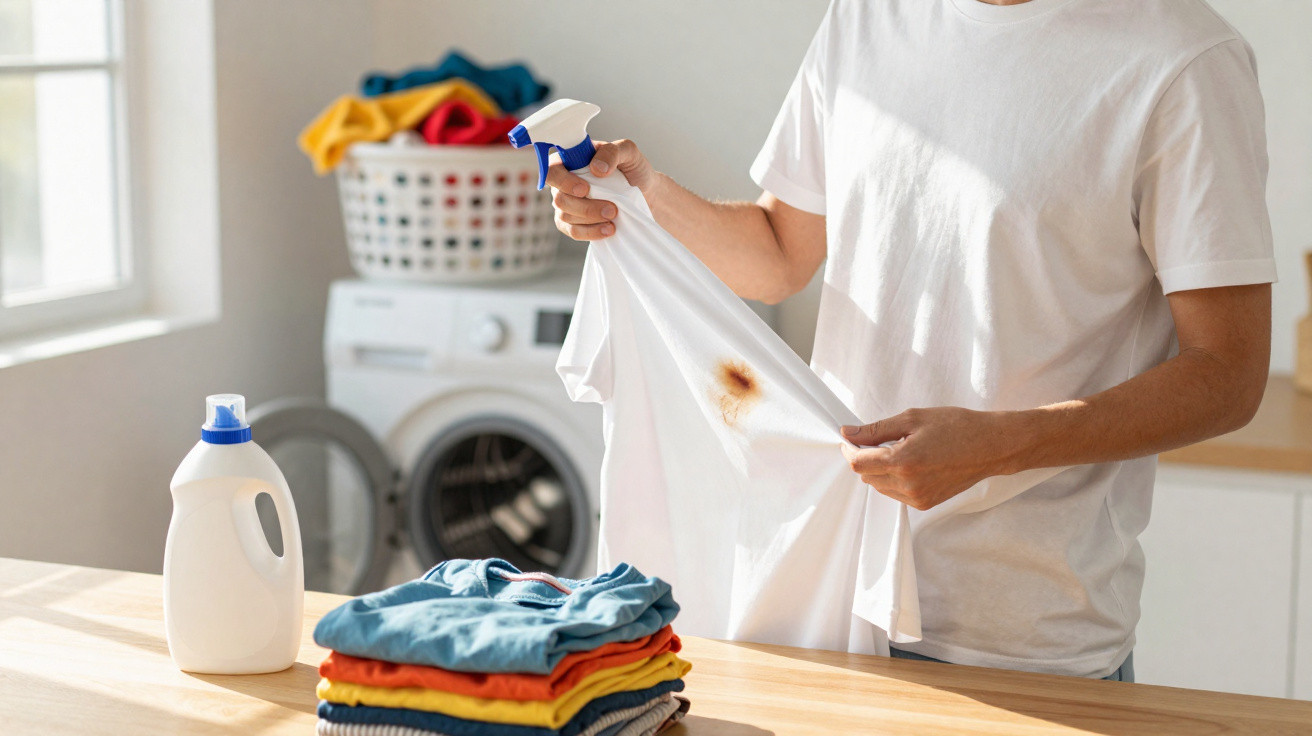
You turn every jumper inside out before it goes in the wash - yet you still end up with stains or greyish shadows?
Then the cause is probably that very habit.
A lot of us do what we were taught by parents or grandparents: always flip clothes inside out before they go into the washing machine. It sounds sensible - supposedly it protects colours, preserves prints and reduces bobbling. But there’s one situation where this automatic routine does the opposite: the item comes out smelling clean, but it still looks “a bit grubby”.
Why we turn clothes inside out in the first place
The reasoning is genuinely solid. During a wash cycle, the outside of a garment repeatedly rubs against the metal drum, along with zips, buttons and other fabrics. Over time, that friction can fade colours and roughen fibres.
Whoever turns dark jeans, a hoodie or a printed T‑shirt inside out helps protect colour, design and fabric from unnecessary abrasion.
There’s another point too: the inside is what sits against your skin. That’s where sweat, deodorant, body oils and traces of cream or make-up build up. If a top goes into the machine inside out, the wash water can reach those areas more directly. As a result, smells are often removed more effectively.
So for many items, washing “inside out” really is a smart default - especially for:
- dark jeans
- hoodies and sweatshirts
- T‑shirts with prints or embroidery
- underwear and close-fitting clothing
The mistake: when turning it inside out protects the stain instead of removing it
Here’s the catch: as soon as the outside is visibly dirty, turning the garment inside out can undermine the wash. A streak of sauce on the front, a dull grey shirt collar, mud on the knee - all of these need direct contact with water, detergent and movement.
Every stain needs to be “facing out” so water, detergent and friction can lift it from the fibres.
If you turn the item inside out anyway, this is what tends to happen:
- the dirty patch ends up folded inward or pressed against other washing
- water and detergent reach the stained area less effectively
- the helpful friction happens mainly on cleaner sections
The outcome: the fabric may smell fresh, but the stain - or at least a faint mark - is still there, often becoming more obvious after drying.
Problem stains: the marks that love to survive the wash
Some types of staining are especially likely to hang around when they’re “sheltered” on the inside during the wash:
- fat and oil (cooking oil, butter, salad dressing)
- sauces (tomato, curry, Bolognese)
- mud and soil
- grass stains
- make-up, foundation, lipstick on collars or sleeves
What they have in common is that they cling tightly to fibres, spread easily, or set if they aren’t dealt with deliberately. That’s why a stain that seemed to disappear can show through again after drying, or leave pale, unattractive edges.
“Smells clean” doesn’t automatically mean “is clean” - especially with greasy stains and strongly coloured marks.
The simple rule: when to wash right side out, when to wash inside out
One rule of thumb captures the whole issue:
| Situation | How to wash? |
|---|---|
| Outside is visibly dirty or stained | wash right side out, and pre-treat if possible |
| No visible stain, just worn | wash inside out to protect colour and prints |
| Sports or performance kit with no visible stains | inside out so wash water reaches sweaty areas |
| Very delicate print or flock finish | usually inside out, even with a stain - but pre-treat thoroughly |
Pre-treat properly: give the stain a real chance
If you leave stains entirely to the machine, you’re more likely to need a second wash - often at a higher temperature - which is far harsher on fabrics than a quick pre-treatment.
The most effective three-step routine is: spot the stain, dampen it, apply the right stain remover.
In practice, these approaches tend to work well depending on the type of stain:
- Grease stains: put a drop of washing-up liquid on the slightly damp area and gently work it in.
- Protein-based stains (sweat, blood): rinse with cold water first, then use a stain remover - never start with hot water.
- Strongly coloured stains (tomato sauce, curry): leave an enzyme-based stain remover or traditional bile soap to work, then rinse briefly.
- Mud: let it dry completely first, brush it off, then pre-treat and wash.
- Persistent odours: apply a little bicarbonate of soda to the affected area as a mild odour blocker.
What matters more than aggressive scrubbing is giving the product time to work. A few minutes is often enough for it to penetrate the fibres. Heavy rubbing, on the other hand, can damage the fabric and make finer materials look worn quickly.
Setting the wash programme sensibly
Even the best pre-treatment won’t help much if the machine settings are wrong - or if the drum is crammed full. A few small adjustments can make a big difference:
- Temperature: in most cases, 30–40 °C is enough, depending on the care label.
- Spinning: use a lower spin for delicate fabrics to protect fibres and seams.
- Load size: don’t fill the drum to the limit - laundry needs room to move for mechanical cleaning.
- Detergent amount: don’t underdose or overdose. Too much can leave a grey film; too little won’t clean properly.
- Zips and Velcro: fasten them before washing so they don’t roughen other items.
A reasonably loose drum delivers more cleanliness than any specialist programme - because water and textiles can actually move.
Get it right while sorting the laundry
The most important moment is before the machine even starts: when you look through the washing basket. A quick check is often enough:
- Are there visible stains on the outside?
- Are typical friction zones such as collars, underarms and trouser hems discoloured?
- Are hooks, bra fasteners or zips open that could snag or damage other items?
Heavily soiled pieces are better kept out of the normal pile: pre-treat them separately and then wash them with similar items. That helps prevent dirt spreading and avoids having to rewash a whole load.
Practical, everyday examples
A few common situations make the “stain facing out” rule easier to apply:
- Children’s trousers with grass and mud on the knee: let the mud dry, brush it off, treat the grass mark, then wash the trousers right side out.
- Black T‑shirt with a bit of sweat just under the arms: turn it inside out; if needed, treat the underarms with a little bicarbonate of soda or stain remover.
- Jeans with a ketchup stain on the front: dampen the stain with lukewarm water, work in stain remover, then put the jeans in right side out.
- Sports top made from technical fabric with no visible stains: wash inside out on a gentle cycle to help preserve membrane and print.
If you apply this logic consciously a few times, you’ll quickly notice the difference: fewer items need a second wash, fabrics last longer, and the gap between “smells fresh” and “looks genuinely clean” becomes obvious.
Especially with pricier pieces - such as quality jeans, running tops or favourite hoodies - it’s worth taking that extra second before you chuck them in the basket. A quick check of whether the dirt is on the outside, the right pre-treatment, and then the correct “turning direction” in the machine is often all it takes to keep clothes looking good for longer and stop stains becoming permanent guests.



Comments
No comments yet. Be the first to comment!
Leave a Comment