
When people think about dirt and germs in the kitchen, they usually picture the sink, chopping boards or the fridge. Another spot is quietly treated as “clean enough” as long as the bin bag gets changed regularly. Yet week after week, that very place builds up a nasty cocktail of scraps, leaked liquids and bacteria - often right under your nose.
The everyday hygiene issue people overlook
We are talking about the ordinary kitchen bin. For many households, it is simply the place where the bag sits. Tie the bag, close the lid, job done. The problem is that, underneath the plastic liner, a film of grease, juices, leftover sauces and tiny bits of food slowly forms. Anything that leaks, drips past the bag, or misses when you throw it in ends up directly in the bin itself.
Behind that harmless plastic bag, a damp mini-habitat develops - perfect for bacteria, mould and lingering smells.
Hygiene specialists have long rated the kitchen bin as one of the grubbiest surfaces in the home - in many cases dirtier than the toilet or the bathroom floor. The reason is straightforward: nobody really feels responsible for it. The bag gets replaced, maybe the lid gets aired for a moment, but the bin itself is rarely cleaned.
Why the bin is dirtier than most people think
The idea that “a bin bag keeps everything clean” is convenient - and wrong. Bin liners tear, slip, leak, or get packed so tightly that they rub along the sides. Liquid waste, in particular, almost always finds a way out.
Common culprits include:
- Leftovers of spoiled food cleared from the fridge
- Packaging smeared with grease, sauces or dairy products
- Juices from meat, ham or fish
- Water released from defrosted frozen foods
- Coffee grounds and damp tea bags
None of this politely stays inside the bag. It runs into corners, pools at the bottom and leaves streaks up the inner walls. In a warm kitchen, that quickly turns into an active breeding ground for germs and fungi within just a few days. That familiar “bin smell” is simply the result of this microbial party.
The outside often gets ignored too. Greasy fingerprints, cooking splashes, dust and crumbs - and because the bin usually sits in a corner that is rarely cleaned properly, grime builds up there as well. The result is a combination that not only smells unpleasant, but also attracts flies and other insects.
How often the bin should actually be cleaned
Hygiene professionals recommend a thorough clean once a week. Not a quick wipe - a proper wash with water and cleaning product. If you are particularly tidy, or you throw away a lot of fresh food waste, it makes sense to do it even more often.
Realistic and workable: wash it at least every two weeks - and always immediately if something leaks or the bag splits.
If there is any standing liquid in the bin, do not wait. Each extra day intensifies odours and increases germ levels. Acting quickly saves you from heavy scrubbing and stubborn smells later.
Step-by-step: how to clean a kitchen bin properly
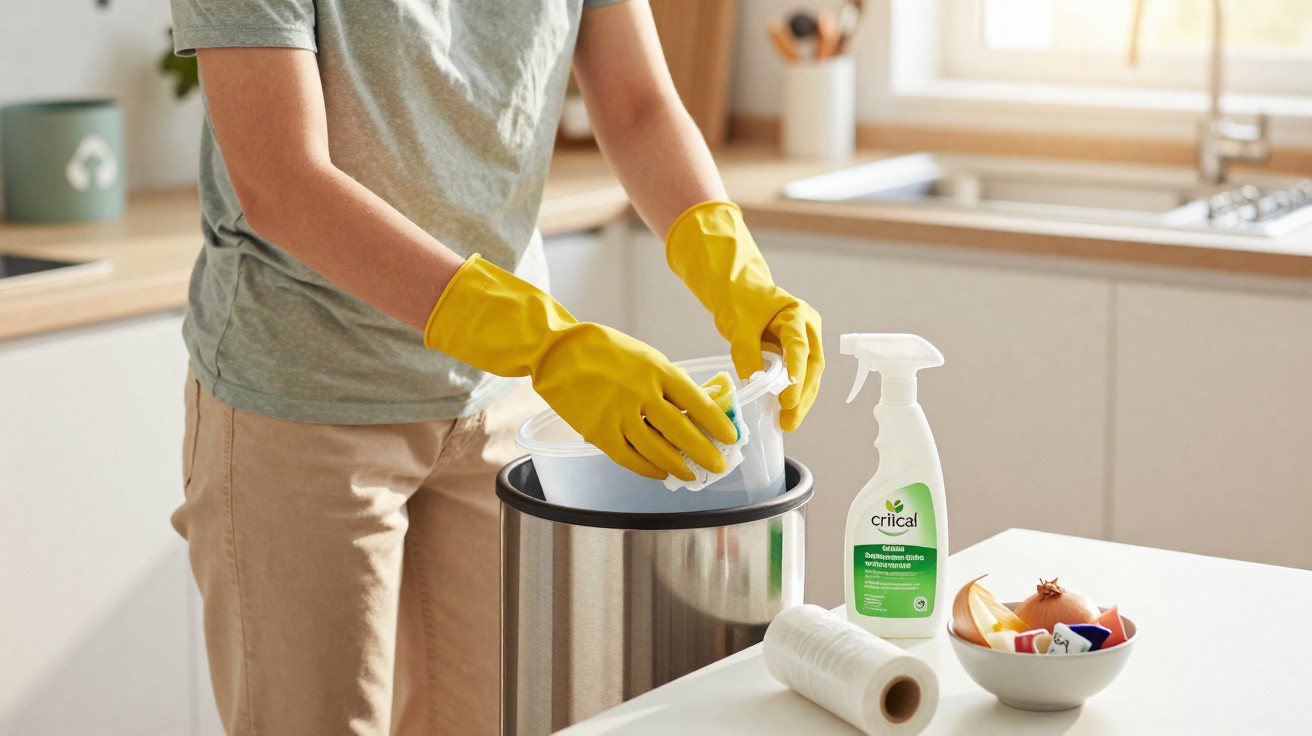
For a deep clean, you only need what most homes already have. This is an efficient way to get it done:
- Empty the bin completely, then remove any stuck-on bits and larger debris by hand or with a disposable spatula.
- Add a small amount of hot water and washing-up liquid to the bin. Leave it briefly so grease can soften.
- Scrub the inside walls thoroughly with a brush or rough sponge, paying special attention to corners and the rim.
- Spray a degreasing cleaner or disinfectant spray inside and let it work for around five minutes.
- Rinse well with clean water until no cleaner residue is visible.
- Dry the inside completely - ideally with kitchen roll or a clean cloth - so no moisture remains.
- Finish by wiping the outside and lid with a damp cloth and a little cleaner.
A particularly practical approach is to place the bin in the shower or bath. Using a hand shower makes it far easier to rinse away foam and loosened dirt than at the kitchen sink, where space is often limited.
Which cleaning products work well
For everyday cleaning, strong washing-up liquid in hot water is perfectly sufficient. If you want to tackle odours more aggressively, you can also use simple household options:
- Vinegar cleaner: neutralises many unpleasant smells and offers mild disinfecting action.
- Bicarbonate of soda (plain, without additives): sprinkle onto damp surfaces, leave briefly, then rinse off.
- Alcohol-free disinfectant cleaner: useful if raw meat or fish juices have leaked.
Most households do not need harsh chlorine cleaners. They can irritate the airways and are only worth considering in rare situations, such as heavily soiled shared bins.
Everyday tricks to slow down how quickly the bin gets dirty
With a few small habit changes, you will scrub less and notice far fewer kitchen smells.
Dispose of high-risk foods correctly
The biggest improvement comes from handling wet and protein-rich waste differently. That includes raw meat, fish scraps, yoghurt or cream leftovers, and foods with a lot of oil.
- Pour off liquids before throwing items away, or soak them up with kitchen roll.
- Wrap very wet waste in newspaper or a small bag before putting it into the bin.
- Do not keep perishable foods in the fridge “just in case” until they turn - use them in time or dispose of them separately.
The drier the rubbish, the more slowly that typical rotting smell develops. It also lowers the chance that liquid will bypass the bag and end up in the bin.
Change bin bags before they overflow
Many people wait until the bag is overflowing at the top. That simply extends the time germs and smells have to build up inside. A better rule is to change the bag when it is roughly three-quarters full - and in summer, sooner than that.
Changing the bag more often takes only a few seconds, but it prevents the bin itself becoming long-term storage for decay.
If you have children or pets at home, this also reduces the risk of rubbish being pulled out accidentally or the bin being knocked over.
Keep food waste separate where possible
If you have a food-waste caddy collected locally, or a compost heap in the garden, take pressure off the main kitchen bin. Coffee grounds, tea leaves, vegetable peelings, eggshells and fruit skins can usually be collected separately without any trouble.
That significantly reduces the amount of damp, fast-decomposing material in your general kitchen waste. The impact on smells is immediate. If you do not have a food-waste collection, you can at least use a small separate lidded container in warmer months and empty it more frequently.
What a dirty bin means for health and day-to-day life
A damp, dirty bin is not only attractive to bacteria - mould thrives there too. People with allergies or sensitive airways can sometimes react even to small amounts of airborne spores. The smell itself is a clear warning that organic material is breaking down.
Flies, maggots and other insects are drawn to fermentation. Anyone who has dealt with a bin infested with maggots knows how unpleasant and time-consuming it is to sort out. Regular cleaning greatly reduces that risk.
There is also a psychological angle: a kitchen can look clean, yet still feel unappetising if it has a constant undertone of bin odour. Many people become accustomed to the smell and barely notice it - visitors will.
Practical add-ons for extra convenience
If you want to cut the effort further, small aids can help. Odour-locking bin bags, a thin layer of newspaper, or a little bicarbonate of soda at the bottom of the bag can absorb liquid and smells. A lid with a seal keeps odours in the bin, but then needs cleaning even more regularly.
If you cook a lot, a second small bin for strongly smelling waste can be useful - for example, fish scraps or bones. You can empty it separately and more often without filling the main bag every time.
If you make the bin a fixed part of your weekly cleaning routine - for instance straight after mopping the kitchen floor - it stops feeling like a dreaded job. It rarely takes longer than ten minutes, but it makes a big difference to how fresh a kitchen looks and smells.
Comments
No comments yet. Be the first to comment!
Leave a Comment