
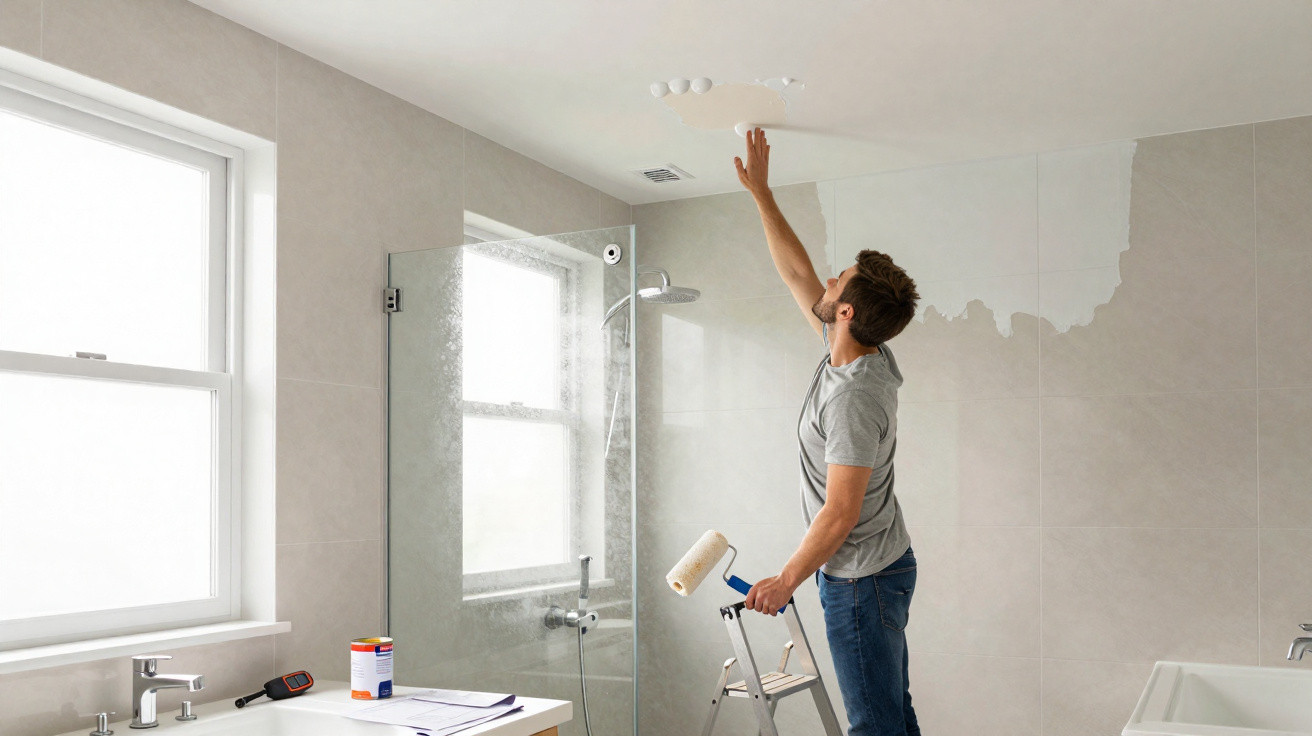
When spring arrives and you fancy a fresher home, it’s tempting to grab a paint roller. A bathroom in particular can look instantly brighter and more up to date with a new coat. Yet many DIYers only discover the sting in the tail about a year later: choose the wrong wall paint for a damp room and it can literally let go-showing up as bubbles, flaking and crumbling patches.
From post-paint pride to a bathroom nightmare
The first few months: everything looks perfect
Right after you’ve painted, everything seems fine. The finish looks smooth, the coverage is good, light bounces around more and the room feels larger. In a bathroom, that before-and-after effect can be especially dramatic.
A lot of people doing DIY opt for budget tubs from the DIY shop-often a standard emulsion intended for dry living spaces. At first, nothing seems amiss. The paint appears to hold up, showers and baths go on as normal, and there’s no hint of trouble.
"The real damage starts out of sight-deep within the paint film, long before the first bubbles appear."
Only after a number of months do the consequences begin to show. Certain spots start to look slightly rippled, with tiny raised areas. Ignore those early warnings and you’re setting yourself up for an unpleasant surprise later.
After 6 to 18 months: bubbles, bulges and flaking
The most vulnerable period is typically between six months and 18 months of everyday use. Seemingly out of nowhere, obvious defects can appear:
- swollen bubbles on the ceiling
- bulges and small hollow spots directly opposite the shower
- flakes of paint breaking away and dropping to the floor
- patchy, dulled areas on walls and ceiling
Two zones tend to suffer most: the bathroom ceiling and the wall areas exposed to direct spray and steam from the shower. In those spots, humidity regularly climbs to 80% or more-well beyond what ordinary wall paint can withstand over the long term.
Why bathroom paint really starts to peel
Moisture works its way underneath the paint film
This problem isn’t down to “bad painting” or the “wrong roller technique”. What matters is the combination of moisture, heat and an unsuitable paint.
Every shower creates thick water vapour that spreads through the entire room. That damp air relentlessly finds a path into even the tiniest pores. Once it gets behind the paint layer, the real process begins:
- Steam condenses on cold surfaces such as ceilings and external walls.
- Moisture seeps into fine hairline cracks and unprotected areas.
- The paint film absorbs moisture from behind, swells and loses adhesion.
- Bubbles form and burst under pressure or further exposure to damp.
In the end, the paint lifts off in larger sheets, the substrate shows through, and the whole job looks like a failed stopgap.
What the NF EN 13300 standard has to do with your bathroom
Interior paints for living spaces can be grouped into classes. In damp rooms, the key factor is resistance to water and water vapour. That’s exactly where the NF EN 13300 standard comes in-many manufacturers list it on the tub.
"Only paint that is explicitly approved for damp rooms and has a high resistance class against water belongs on bathroom walls."
If you focus only on colour and price in the shop, it’s easy to make the classic mistake: using normal wall paint instead of damp-room or bathroom paint. Safer choices include:
- glycol resin and/or solvent-based bathroom paint (often tougher, but with a stronger smell), or
- special acrylic paint for damp rooms with clear labelling on the container.
The important point is the formulation: it uses specific resins that repel water vapour and help stop moisture migrating behind the paint film. That’s what dramatically extends how long the finish lasts.
How to protect your bathroom long-term from bubbles and mould
In a bathroom, you can do very little without primer
If you simply roll paint straight over the old surface to save time, you’re cutting corners in the wrong place. Especially with plasterboard, filled walls, or older, weakened coatings, you need the right primer.
A damp-room primer or specialist bonding primer does several jobs at once:
- it seals and stabilises the substrate so it doesn’t soak up paint like a sponge
- it closes pores and micro-cracks that moisture could later penetrate
- it helps the new coat cover evenly
- it improves adhesion so the finish doesn’t start peeling again
In the shower area and on the ceiling, an additional pre-coat with particularly high moisture resistance is well worth it. You won’t see that extra work afterwards-but you’ll notice it because the paintwork stays stable for years.
Without effective ventilation, even the best paint only goes so far
Paint systems can offset a lot, but not everything. If the room turns into a dripping cave after every shower and there’s hardly any airflow, the climate will eventually tip into the danger zone. That’s where a technical fix helps.
It’s wise to have a ventilation system that consistently replaces enough air. As a guide, a typical bathroom should extract around 30 m³ of air per hour. In practical terms, that simply means the steam is removed quickly instead of being absorbed into the ceiling and walls.
"If you can see your mirror clearly again minutes after showering, you’re usually on the right track when it comes to humidity."
A working extractor fan, sufficient make-up air and regular purge ventilation reduce bathroom moisture below the critical threshold of roughly 65% relative humidity. Under that level, paint and plaster tend to last much longer.
Two coats, cross-rolled-and patience while it cures
Applying the paint itself looks straightforward, but many people slip up on one detail: drying time. Bathroom paint in particular needs time to cure properly.
A proven approach in practice:
- apply the first coat evenly, without overworking the surface
- allow at least 24 hours to dry completely, and use the bathroom as little as possible
- roll the second coat at a right angle to the first (cross-rolling)
- leave it to dry for a full day again before taking a hot shower
That cross pattern tightens the surface, closes small weak spots and creates a noticeably stronger barrier against steam and condensation.
What to check before your next bathroom project
Spotting causes early instead of redoing everything later
If you can already see bubbles, cracks, or dull, chalky patches in your bathroom, it’s worth taking a closer look. Typical warning signs include:
- paint bubbles that feel soft when pressed
- areas that sound slightly hollow when tapped
- dark shadows or marks even though there’s no obvious direct water contact
- mirrors and windows fogging up frequently despite a short shower
The sooner you act, the less area you’ll later need to sand back completely or rebuild. Often it’s enough to remove damaged sections cleanly, fill, prime, then repaint with bathroom paint.
Practical tips for planning your next renovation
If you’re renovating your bathroom in spring or summer, a few simple steps can prevent a lot of hassle:
- In the DIY shop, ask specifically for “bathroom paint” or “damp-room paint” rather than just choosing your favourite shade.
- Check the stated resistance to water and wet scrubbing, not only claims like “high coverage”.
- Inspect the extractor: does it work at all, does it run on long enough, and is the airflow path clear?
- While painting, keep a window on the latch or create a through-draught so moisture can escape.
- Don’t shower between coats, as that disrupts the drying and curing process.
Approached this way, you avoid the frustrating experience of standing there again a year later with filler, sandpaper and a roller. The mix of the right paint, thorough preparation and consistent ventilation turns a quick cosmetic refresh into a renovation that holds up for years-without bubbles, cracking or flaking.

Comments
No comments yet. Be the first to comment!
Leave a Comment