
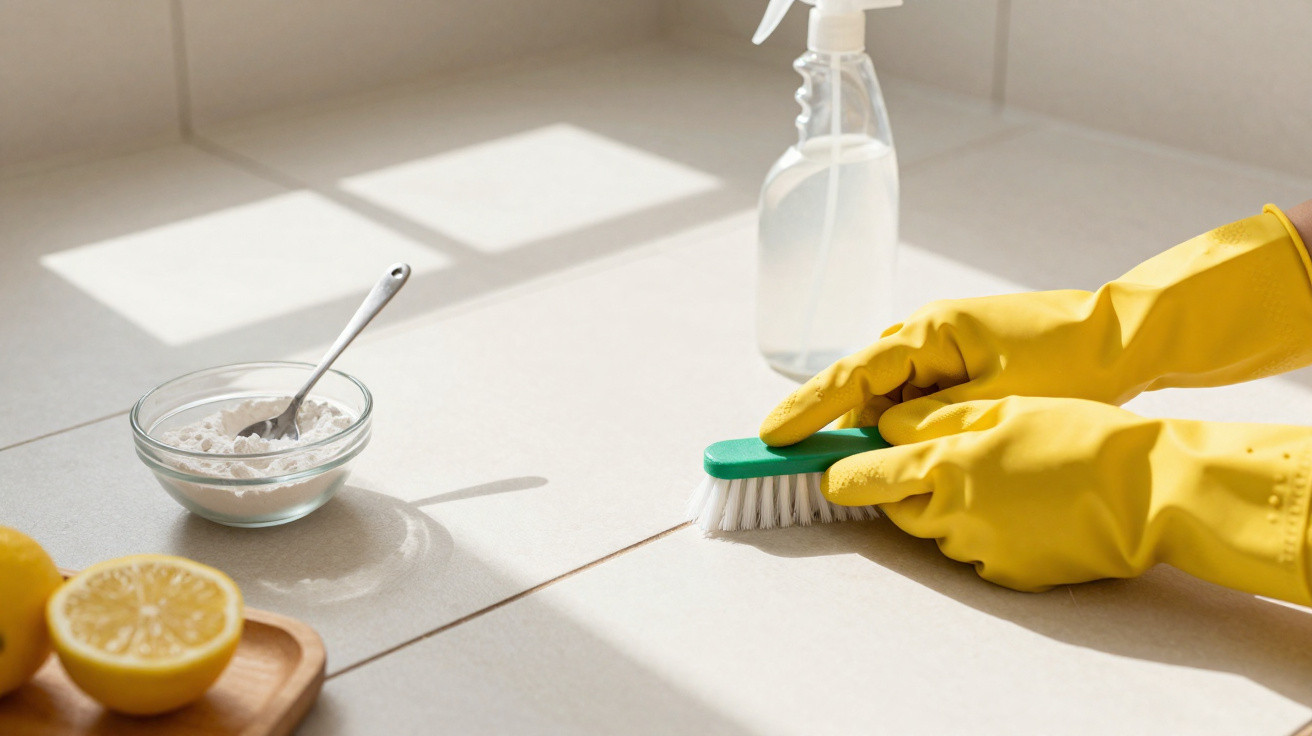
Blackened grout in the bathroom can look neglected in no time at all - even if you clean regularly.
A simple kitchen blend is now giving people something to talk about.
No chlorine smell, no harsh cleaners and no hours of scrubbing: a mix of four everyday household ingredients can bring greyed and darkened bathroom grout back into shape in record time. Many people still don’t know this approach, yet it’s straightforward, inexpensive and surprisingly practical for day-to-day life.
Why bathroom grout turns black so quickly
Few rooms stay as damp as the bathroom. Warm steam, limited air circulation and tight corners create ideal conditions for mould spores. The narrow gaps between tiles absorb moisture and tiny dirt particles - and the colour shifts.
On top of that, many people instinctively reach for aggressive chlorine-based products or strong bleaches. They may work briefly, but they can attack the grout itself, make it porous and roughen the surface. Then dirt clings even more easily - a vicious circle.
"A gentle but highly effective mixture of four kitchen ingredients loosens mould and grime without destroying the grout - and it does so in around 15 minutes."
The four ingredients: what goes into the grout mixture
The exact version can vary slightly, but the basic idea stays the same: a blend of a mild abrasive, an acid, a degreaser and a binding agent.
These components are commonly used:
- Bicarbonate of soda or baking powder - provides a light abrasive effect and helps neutralise odours.
- White vinegar or lemon juice - breaks down limescale, has a mild disinfecting effect and helps lift dark deposits.
- Mild washing-up liquid - cuts through greasy films that settle on grout and makes wiping easier.
- Water or a small amount of low-concentration hydrogen peroxide - thins the mixture into a spreadable texture and supports removal of deeper stains.
Together they form a paste you can apply precisely to dirty areas, without flooding the whole shower.
How to apply the mixture correctly
For this method to work well, the order and the contact time matter. If you rush in and wipe straight away, you lose a lot of the benefit.
- Dampen the grout: Lightly wet it with warm water so the pores open.
- Mix the paste: Combine bicarbonate of soda with a little washing-up liquid, then carefully add vinegar or lemon juice until you get a thick, creamy paste. Add a few drops of water if needed.
- Apply with precision: Use an old toothbrush, a small brush or a cotton bud to put it directly onto the dark grout lines.
- Leave it to work: Wait around 15 minutes - during this time the mixture loosens mould residue and discolouration.
- Brush again: Go over the grout once more with the toothbrush to lift the loosened build-up.
- Rinse thoroughly: Rinse with warm water and rub dry with a cloth.
If the staining is very heavy, repeat the process a second time or leave the paste on a little longer.
A visible result fast - instead of hours of scrubbing
What makes this approach so appealing is the speed: many users report that, after just a quarter of an hour, the grout already looks noticeably lighter. The paste doesn’t only tackle surface dirt; it also breaks down the typical grey-black layer made up of soap residue, limescale and mould spores.
At the same time, the effort stays manageable. While the paste is doing its job, you can get on with other chores - or simply take a break. The actual scrubbing is limited to just a few minutes.
Cheaper than specialist cleaners - and usually already in the cupboard
Another reason the method is popular: in many homes, all four ingredients are already sitting in the kitchen cupboard. There’s no need for a trip to the DIY shop, and no pricey specialist product with big-letter promises.
| Product | Typical shop cost | How far it goes |
|---|---|---|
| Bicarbonate of soda | a few pence per use | several cleaning sessions |
| Vinegar | low, often sold in large bottles | usable for bathroom, kitchen and windows |
| Washing-up liquid | usually already on hand | for dishes and surfaces |
| Water / peroxide | virtually free in small amounts | enough for many uses |
Compared with branded cleaners and specialist sprays that often cost several pounds per bottle, the grout paste is clearly ahead financially - with a similar effect.
Gentler on the bathroom, your lungs and the environment
Avoiding chlorine and strong bleaches has further benefits. The grout surface tends to stay stable for longer because it isn’t chemically attacked each time. Cracks, crumbling and wash-out happen less often, which can reduce refurbishment costs over the long term.
There are health benefits too. You don’t get harsh fumes that can irritate the airways in a poorly ventilated bathroom. Families with children or pets, in particular, often feel safer using mild household ingredients.
"If you avoid aggressive chemicals, you protect grout, airways and wastewater - and still get a visible result."
How often should you clean grout this way?
The 15-minute method works well as a deeper clean every few weeks, or whenever visible darkening appears. For everyday upkeep, a lighter routine is usually enough.
A practical bathroom rhythm:
- After every shower: Use a squeegee to remove water from tiles and grout.
- Once a week: Wipe tiles and grout with a normal bathroom cleaner and a sponge.
- Every few weeks: Use the four-ingredient paste on problem areas.
Stick to this routine and you significantly reduce the risk of mould. Deep grout cleaning becomes more of a quick refresh than an emergency fix.
Risks and what to watch out for
Even with household ingredients, it pays to be cautious. Sensitive natural stones such as marble or certain limestone surfaces don’t react well to acids. In those cases, test the mixture first in an inconspicuous spot or choose versions with less vinegar.
One more point: if you use hydrogen peroxide, it should only be in a low concentration and in small amounts. It can gently lighten stains, but it shouldn’t get onto textiles, coloured silicone seals or delicate surfaces. Wearing gloves helps protect your skin while you work.
Why the method is still not widely known despite being effective
Many households default to ready-made cleaners because that’s what advertising pushes. Home remedies can quickly be dismissed as “old-fashioned” or “unsafe to use”. Yet grout is a perfect example of how effective simple combinations can be when applied deliberately and with a bit of method.
Once someone has tried the paste on a heavily darkened area and seen the difference, it often becomes a regular part of their routine - a quiet but convincing alternative to the supermarket bottle and spray head.


Comments
No comments yet. Be the first to comment!
Leave a Comment