
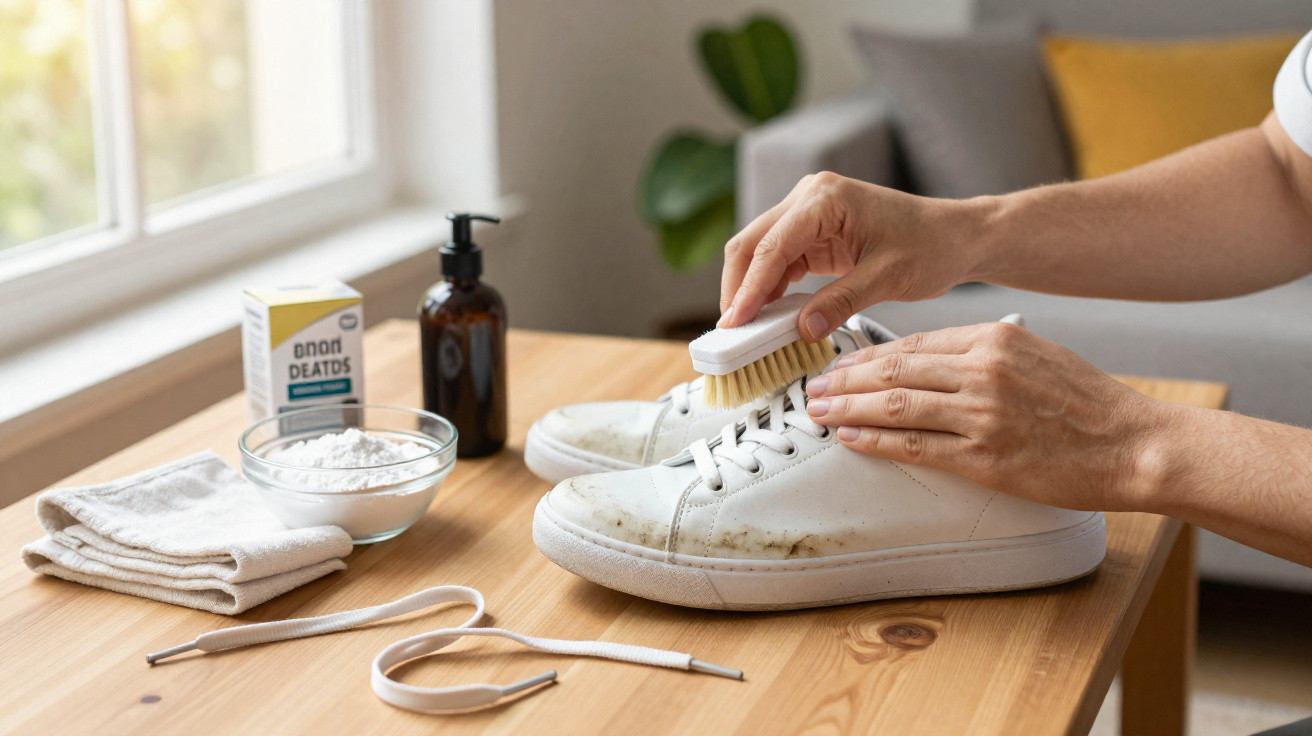
Spring sunshine, a stroll around town - and your once-white trainers now look more dull grey than bright.
With one simple household trick, you can bring back that like-new look.
When beloved white trainers are left looking tired after winter slush and Underground grime, lots of people reach for the washing machine in desperation. It feels convenient, but it isn’t kind. Fibres can stretch out, glue can soften and fail, and materials can start to yellow. In reality, a quickly mixed paste made from two inexpensive ingredients is often enough to make shoes look almost new again - without putting stitching, soles or shape at risk.
Why the washing machine does more harm than good for your sneakers
Heat, friction, moisture: the perfect recipe for wrecking shoes
Even a “delicates” cycle at 30 °C can be brutal for trainers. In the drum they repeatedly bang against metal, become thoroughly soaked, and stay warm for an extended period. That combination attacks the weak points:
- The adhesive between upper and sole softens and turns brittle.
- Stitching is put under constant tension it was never designed for.
- The shoe’s shape and support can shift.
At first glance, trainers may look cleaner after a wash, but their lifespan noticeably drops. It’s not uncommon for the sole to start separating after only a few walks, or for the heel to collapse because the material has lost its structure.
Why stains often look worse after a machine wash
Moisture inside a shoe can be deceptive. Instead of lifting dirt out, water can push it deeper into fabric or leather. Once drying begins, you often get those familiar yellowish tide marks - especially on rubber and faux leather. On top of that, detergent residue can cling to fibres and then attract dust as if by magnetism. The result: they look fine straight after washing, but get dirty again much faster.
"If you keep putting trainers in the machine, you may gain short-term cleanliness - but you risk permanent damage and unattractive discolouration."
The natural double trick: two household staples instead of specialist cleaners
Sodium bicarbonate: a gentle abrasive with a brightening boost
The first key ingredient is sodium bicarbonate, often sold as “bicarbonate of soda” or plain baking soda without additives. Its fine grains work like a very mild exfoliant:
- They loosen ingrained dirt from fabric, faux leather and rubber.
- They help make yellowed areas look brighter.
- They neutralise odours inside the shoe.
Unlike harsh scouring powders, bicarbonate of soda won’t scratch the surface. It behaves more like an eraser for grey marks and light staining.
Soft black soap: tough on grease, kind to leather and soles
The second component is soft black soap made from plant oils. Traditionally used around the home (for wood, tiles or metal), it has several benefits for trainers:
- It breaks down grease, road dirt, grass stains and even traces of rubber from the street.
- It conditions leather and faux leather instead of drying them out.
- It avoids aggressive solvents that can strip colour or make materials go stiff.
Together, the mild abrasion plus grease-cutting action creates a clean that feels far closer to proper shoe care than a quick machine cycle.
Mixing the paste: a shoe treatment in two minutes
For a basic clean on one pair of trainers, a small amount is enough. You’ll need:
- 2 tablespoons of bicarbonate of soda
- 1 tablespoon of soft black soap
- a small bowl and a spoon for mixing
The right texture makes all the difference
Add both ingredients to a bowl and stir vigorously. You’re aiming for a thick, lightly foaming paste - similar to firm shaving foam or a very creamy toothpaste. If it’s too runny, it will slide off the surface and soak the material too much. If that happens, simply mix in a little more bicarbonate of soda.
"The paste should cling to the surface and lift dirt without soaking the shoe right through."
Why you should be sparing with water
Too much water inside a shoe leads to warping, glue problems and those dreaded tide marks. A thick paste lets you work precisely on the upper and the sole without flooding every fibre. That control is exactly what a washing machine can’t offer - and it’s why the bowl method is much gentler on materials.
Applying it properly: turning grubby shoes back into favourite trainers
Prep first: remove laces, brush off loose dirt
Before you start with the paste, a quick pre-check pays off:
- Take out the laces and wash them separately by hand.
- Brush away dry mud with a soft brush or wipe with a cloth.
- If the insole is removable, tap it out briefly and let it air.
That way, the paste can focus on genuinely stubborn grime.
Work with a brush: small circles, targeted areas
An old toothbrush or a soft nail brush is ideal. Pick up a little paste and work it into dirty areas using small circular motions:
- The sidewall of the sole, especially where yellowing or road dirt has built up.
- The toe area and heel, which tend to darken quickly.
- Creases in the upper where dust collects.
For heavy marks, go over the same spot more than once. Smooth leather only needs gentle pressure. On rougher textures, you can scrub a bit more firmly so the grains reach into the pores.
Dwell time: let the mixture do the work
After application, leave the shoes for about 15 minutes. During this time, black soap loosens grease and dirt, while bicarbonate tackles discolouration and binds odours. This “mask moment” noticeably boosts results - scrubbing alone, without letting it sit, often performs worse.
Removing it gently: clean, but not soaking wet
Use a microfibre cloth instead of running water
To lift off the paste, use a slightly damp microfibre cloth. Wipe the surfaces gradually, rinsing the cloth at the sink now and then and wringing it out well. This keeps the water volume low so the shoe only absorbs as much moisture as absolutely necessary.
"Holding shoes directly under the tap may feel quick, but over time it ruins shape, colour and glued areas."
Drying properly: no radiator, no blazing sunshine
After cleaning, let trainers air-dry in a well-ventilated, shaded room. A radiator, hairdryer or sunny windowsill is a poor choice, because heat can dry out materials, distort them, and encourage yellowing again. Stuffing the inside with paper - such as kitchen roll or newspaper - helps the shoes keep their shape and draws moisture out.
How to keep the fresh look for longer
Waterproofing spray as a shield against city grime
Once the shoes are completely dry, a clear waterproofing spray is worth using. It sits like an invisible film over fabric and leather, helping liquids bead off and reducing how strongly dust clings. The next clean is much easier because dirt can’t sink as deeply into the material.
A mini routine after wearing prevents permanent grey
If you give your trainers a quick check after every second or third wear, you’ll save yourself a lot of effort later. Small marks can be wiped away in seconds with a damp cloth, a magic eraser, or a quick spray of a bicarbonate-and-water mix. That means the big deep-clean is only rarely needed - and your shoes stay everyday-white.
More than looks: hygiene, sustainability and knowing your materials
Clean trainers smell less and last longer
Bicarbonate of soda doesn’t just improve appearance - it also helps with odours inside the shoe. Sprinkling a pinch into dry shoes from time to time and leaving it overnight can reduce bacterial growth and musty smells. Combined with occasional airing and socks made from breathable materials, it creates a noticeably more comfortable foot climate.
Why this method is more sustainable than buying new or machine washing
Every pair of trainers you keep in use for longer saves resources: less plastic production, less transport, and less packaging. The household ingredients described here are inexpensive, long-lasting and use minimal harsh chemistry. Choosing careful cleaning over heavy-duty detergents and constant replacements is kinder to both your wallet and the environment.
A quick guide to suitable and tricky materials
| Material | Suitability of the paste | Note |
|---|---|---|
| Smooth leather | well suited | Brush gently, then apply leather conditioner if needed |
| Faux leather | very well suited | Don’t work too wet, otherwise tide marks can appear |
| Textile / canvas | suited | Don’t overload with paste; treat stains lightly more than once |
| Suede / nubuck | only limited | If at all, use very carefully on small spots and with a specialist brush |
With delicate suede, it’s especially sensible to test on an inconspicuous area first. For classic white fabric or faux-leather trainers, though, this paste is ideal. Put in a little time and you’ll quickly see: with the right technique, you don’t need a washing machine or expensive specialist products to turn grey everyday shoes back into presentable favourites.

Comments
No comments yet. Be the first to comment!
Leave a Comment