
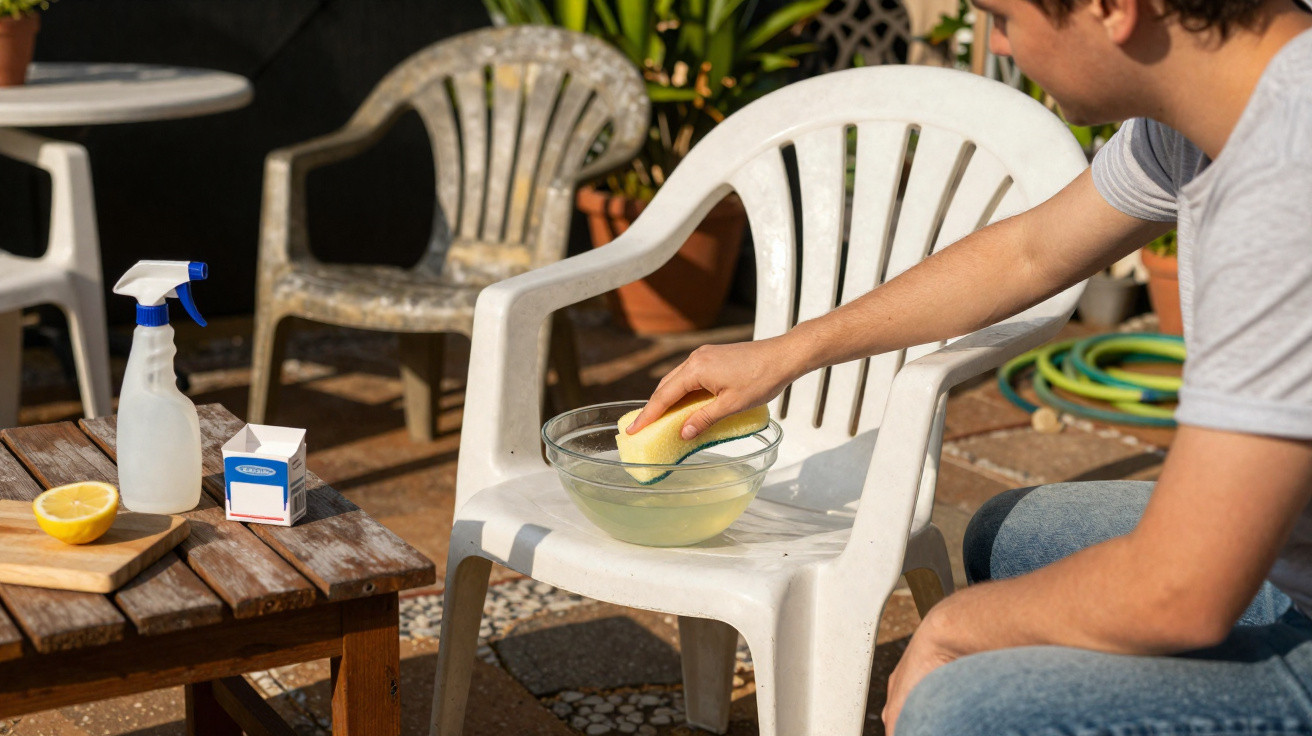
Plenty of people, at this point, immediately think about the next tip run or popping to the DIY shop. In reality, most faded plastic garden sets have far more life left in them than you’d expect. With a simple, low-cost blend of everyday kitchen ingredients, you can bring back a surprising amount of shine - without a pressure washer or harsh chemicals.
Why plastic garden furniture starts to look tired so quickly
Plastic left outdoors takes a constant battering. Sun, rain, wind and everyday grime slowly break down the surface. The result is furniture that looks dull, feels more porous, and appears yellowed or washed out.
The biggest culprit is the UV content in sunlight. It roughens the top layer and causes tiny micro-cracks where dust, pollen and soot can lodge. On white pieces, that tends to show up as a noticeable yellow tone; on coloured furniture, the colour often looks faded and “chalky”.
"The rougher the plastic surface, the more dirt sticks - the apparent ‘film of grime’ is often a mix of yellowed material and baked-on residue."
Other garden materials suffer too, just in different ways:
- Metal: can rust if the paint is damaged
- Wood: turns grey, needs oiling and occasional sanding
- Synthetic rattan: may become brittle and crack in strong sun
Plastic does have one advantage: as long as nothing is snapped or deeply torn, the look can usually be rescued without too much trouble.
The two-step cleaning plan: first wash, then brighten
Before you reach for specialist products, it’s worth doing a proper basic clean. The improvement is often bigger than you think.
Step 1: Remove dust and loose dirt
Start by shifting anything that’s only sitting on the surface:
- Brush away cobwebs with a small brush or hand brush
- Sweep off loose soil and leaves with a soft broom
- Quickly scrub joints and crevices with an old toothbrush
Then fill a bucket with warm water and a little washing-up liquid. Using a soft cloth or sponge, wipe down chairs and table from top to bottom. This lifts grease, dust and superficial marks.
Step 2: A homemade mix for grey haze and yellowing
If the furniture is clean but still looks flat, this is the key step: a DIY cleaner you can mix up from kitchen staples.
You’ll need a spray bottle. Combine:
- 500 millilitres of warm water
- 1 tablespoon of clear household vinegar
- 2 tablespoons of bicarbonate of soda (or standard baking soda)
- a small squirt of washing-up liquid
Give it a quick shake, then spray generously over the tabletop, chair backs and seats. Work it in with a soft sponge, leave it for a few minutes, then rinse thoroughly with clean water.
"The combination of vinegar and bicarbonate lifts the grey haze and helps neutralise discolouration - while washing-up liquid cuts through grease and road dirt."
Finish by drying the surfaces, so a new film of limescale and water spots doesn’t form.
Dealing with stubborn marks and deeper discolouration
Some plastic furniture has seen years of use, sat unprotected in full sun, and looks accordingly worn. In those cases, a basic clean isn’t always enough.
Cleaning stone for light-coloured furniture
On white sets, a so-called cleaning stone can work very well. It’s a solid block made from mineral powder, soap and glycerine, picked up with a damp sponge. It’s mildly abrasive - essentially a gentle exfoliation for the plastic.
How to use it:
- Load foam onto a damp sponge from the cleaning stone
- Rub the yellowed areas in circular motions
- Leave briefly, then rinse very thoroughly with water
- Dry off to prevent streaks
A cleaning stone is best suited to white or very pale plastics. On darker colours it can leave marks, so test in a hidden spot first.
What works on coloured furniture
With bright or dark sets, take a cautious approach. Strong abrasives can strip the already-stressed colour layer even further. Many households stick to:
- the vinegar–bicarbonate mix described above
- a soft microfibre cloth instead of a scouring sponge
- several short cleaning passes rather than one aggressive attempt
If you want to play it safe, always test any new product on the underside of a chair leg or another inconspicuous area.
When the rescue effort is no longer worth it
As tempting as a makeover is, not every piece should be kept in use. Cheaper plastic chairs don’t just age visually - the material itself can weaken.
Before you start the big scrub, take a moment to check each item properly:
- Cracks in the seat or backrest: risk of snapping - better to discard.
- Brittle, crumbly patches: a sign of fatigue; it may suddenly give way.
- Badly warped legs: wobbly chairs are a safety hazard.
If it’s purely an appearance issue, there’s another option: lightly sand with fine sandpaper (around 120 grit) and then apply a specialist plastic spray paint. This can create a fairly even, refreshed finish. Important: spray outdoors only, and follow the instructions on the can.
How to keep your set looking good for longer
The most effective way to avoid yellowed plastic is prevention. If you keep a few points in mind when buying and storing, you’ll spend far less time scrubbing later.
What to look out for
| Problem | Practical solution |
|---|---|
| Strong sunlight | Choose furniture with UV protection; position it in shade |
| Winter damp and frost | Store the set somewhere dry or cover with a breathable cover |
| Persistent film of grime | Clean once a month with water and a little washing-up liquid |
| Grease and barbecue residue | Wipe marks off as soon as possible with a damp cloth |
Some people swear by oil or similar products to make plastic shine again. It often looks good in the short term, but over time it can attract more dust and dirt because the surface feels tacky. For plastic garden furniture, that’s usually counterproductive.
Why the effort pays off financially and environmentally
A new plastic set is easy to buy, but every replacement costs money and creates waste. If the furniture is still reasonably sturdy, it makes sense to keep it going for a few more seasons.
The DIY mix of water, vinegar, bicarbonate of soda and washing-up liquid costs only a few pence. Compared with specialist cleaners or buying new, it’s almost nothing - and the same ingredients are handy for the bathroom, kitchen, or even cleaning a balcony floor.
At the same time, you cut down on plastic waste. Many older sets end up at the recycling centre, even though an hour’s work could have kept them usable for several more summers. Look after your furniture and you’ll replace it less often - saving resources in the process.
Practical tip: how to plan your “garden furniture cure”
This job is simplest on a dry day with light cloud. In strong sunshine, the cleaner dries too fast and can leave streaks.
- Start in the morning or later in the afternoon
- Lay out everything beforehand, including bucket, sponge and cloths
- Clean thoroughly first, then maintain - don’t mix the stages
- Take photos along the way: the before-and-after is hugely motivating
If you put the clean-up in the diary as a spring routine, the familiar shock at the first sunny day feels far less dramatic. The set looks fresher, feels genuinely clean, and that coffee on the balcony tastes twice as good.



Comments
No comments yet. Be the first to comment!
Leave a Comment