
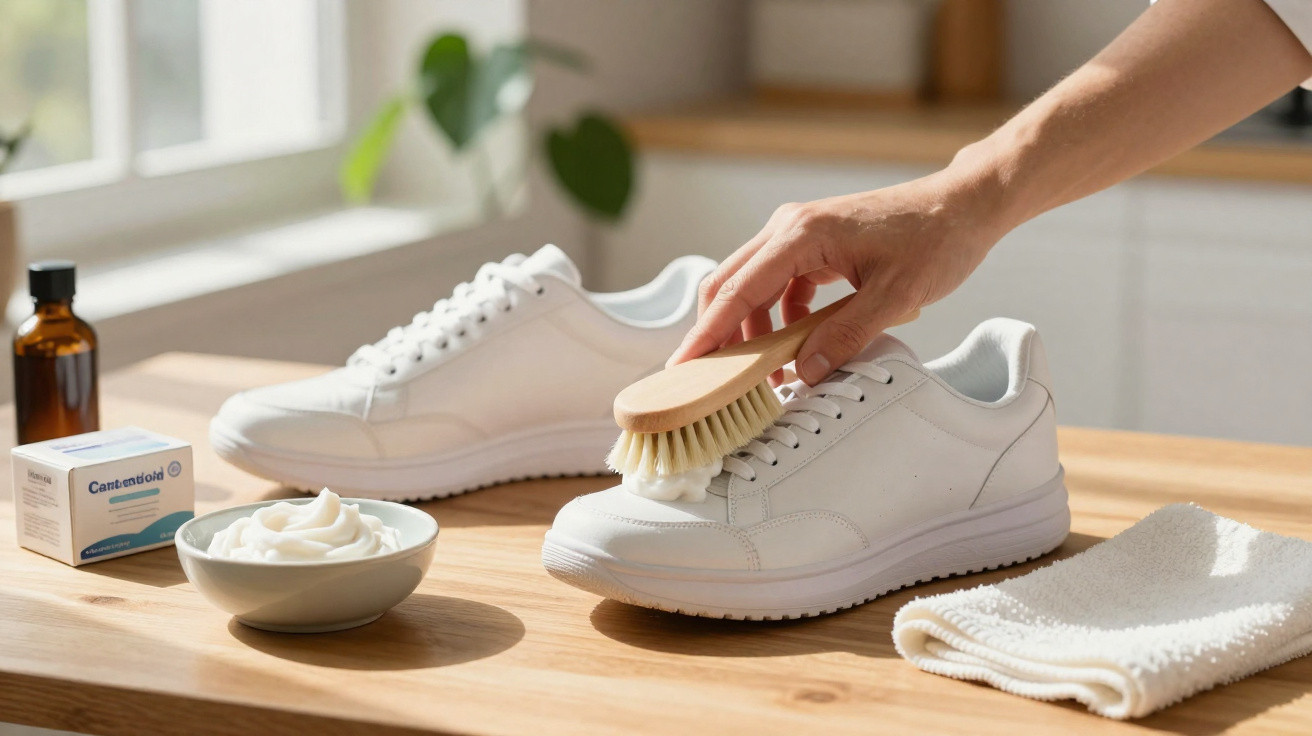
White trainers have long since stopped being just sportswear. They work with a summer dress, smarten up an office outfit, and make almost any look feel more relaxed. The annoying part is that after a few weeks of city wear they often look more grey than white. Many people then toss their trainers straight into the washing machine and later wonder why seams have failed or yellow edges have appeared. There’s a far gentler, almost free alternative that brightens shoes again without wrecking them.
Why the washing machine quietly destroys white trainers
Heat, friction, moisture: the invisible trainer-killer
A 30 °C gentle cycle sounds harmless in theory. In reality, a lot happens inside the drum that trainers simply don’t like. Shoes repeatedly knock into each other and against the metal sides. That mix of rubbing, warmth and prolonged dampness attacks the materials.
The glues used in the sole soften, lose grip and can gradually come away. Stitching is put under strain it was never designed to handle. Especially with trainers built from multiple layers, the whole construction takes a hit.
"If you keep putting trainers through a full soak in the machine, you significantly shorten their lifespan - even if they look clean afterwards."
The “clean” illusion: where dirt actually sets even deeper
There’s another catch: water often pushes grime further into the material instead of lifting it out. Once the shoes dry, the familiar yellowish tide marks show up - particularly around the sole and at the joins between fabric and rubber.
Detergent residue can also remain trapped in the fibres, especially if the machine was overloaded. Those leftovers attract dust and road dirt. The result: the shoes quickly look blotchy again - sometimes even worse than before.
The natural duo that beats chemical cleaners
Sodium bicarbonate: a gentle abrasive with a brightening effect
Instead of heading for the machine, it pays to reach for what’s already in the cupboard. The core of this trick is sodium bicarbonate - commonly sold as “bicarbonate of soda” or as additive-free baking soda. Its fine crystals act like an ultra-mild scouring paste.
It lifts embedded dirt from small creases in leather or from the surface of fabric without damaging the finish. At the same time, sodium bicarbonate has a mild whitening effect and can help reduce yellowing. That makes it ideal for white areas that have gone dull and grey.
Soft black soap: cuts grease and is kinder to materials
Its partner is soft black soap, a traditional cleaner made from plant-based oils. It breaks down grease, road grime, sunscreen marks, tar spots or green stains picked up from grass, while generally being less harsh on materials than aggressive chemicals.
It’s particularly useful on leather and higher-quality plastics because it does two jobs at once: it cleans and adds a touch of conditioning, so the shoe doesn’t end up feeling dry or brittle.
"The combination of sodium bicarbonate and black soap cleans thoroughly without soaking the shoe - that’s the key difference from the machine."
The “paste” for clean trainers: how to mix it
For the clean you only need a small bowl and two everyday ingredients:
- 2 tablespoons sodium bicarbonate (pure powder, not a raising agent)
- 1 tablespoon soft black soap
The right texture: think toothpaste, not soup
Stir the two together vigorously until you get a thick, creamy paste. Aim for a consistency similar to shaving foam or a stiff toothpaste. If it looks too runny and drips off the spoon, add a little more powder.
That thickness matters: the paste should cling to the surface and work there - not run into the shoe and soak everything. A slight fizzing as you mix is normal and shows the reaction has started.
Why less water works better here
The biggest weakness in many cleaning attempts is using too much liquid. If you scrub with a big bowl of water and fully saturate the shoe, you may get plenty of foam - but you can also end up with rippled leather, swollen fabric and fresh water marks.
A concentrated paste avoids that. It stays on the surface, loosens dirt where you can see it, and keeps the inside of the shoe largely dry. That helps the shape hold and stops glued areas from softening.
How to apply the mixture properly
Start with the worst areas: sole and creases
To apply it, an old toothbrush or a soft nail brush is enough. Pick up a small amount of paste and work it into the stains using circular motions.
Pay extra attention to:
- the rubber sole, especially the edge running around the shoe
- the usual creases over the toes
- slightly rough fabric areas where dust sticks quickly
The more time you spend on these spots, the clearer the white will look afterwards. Lightly yellowed soles often regain a noticeably fresher look too.
Leave it to work: why 15 minutes matters
After applying, leave the paste on for around 15 minutes. During this time the black soap dissolves grease and stubborn residue, while the powder gently brightens.
"If you wipe the mixture off straight away, you lose a big part of the effect. The waiting time is the ‘turbo’ of the whole trick."
Wipe and dry correctly - or new tide marks can appear
Microfibre cloth instead of the tap
When removing the paste, one rule applies: no full soak. Lightly dampen a soft microfibre cloth, wring it out well, then carefully lift away the residue. Rinse and wring the cloth repeatedly so you don’t smear a grey film back over the shoe.
A direct stream under the tap may be fast, but it saturates the entire surface - and that’s exactly what can lead to those unattractive yellow marks again later.
Air-dry in the shade: no heat, no stress on the materials
Once cleaned, let the trainers dry at room temperature in an airy, shaded spot. Avoid radiators, hairdryers and direct sun. Strong heat accelerates glue ageing, makes leather brittle and encourages fresh discolouration.
A practical tip: loosely stuff the shoes with newspaper. It draws out remaining moisture and helps the trainers keep their shape. Replacing it after one or two hours speeds things up without overloading the materials.
How your trainers stay white for longer
Waterproofer spray as an invisible shield
When the trainers are fully dry, a quick extra step is worthwhile: apply a waterproofer spray suitable for textiles and/or leather. It forms a thin protective layer so water and dirt don’t cling as easily.
That not only reduces new stains, it also makes the next clean much quicker. One application can offer several weeks of everyday protection - depending on the weather and how often you wear them.
A mini routine after wearing prevents built-up grime
If you give your shoes a quick check straight after wearing them, you’ll save yourself bigger cleaning sessions later. Small scuffs on the sole can often be removed immediately with a damp cloth or a “dirt eraser” sponge.
- after city walks: wipe the sole briefly with a cloth
- after rain: let them dry, then brush off loose dried mud
- for stains: touch up targeted areas with a little paste rather than treating the whole shoe
What to watch out for depending on the material
Smooth leather, faux leather, fabric - not every surface reacts the same
Smooth leather generally handles the paste well, as long as you don’t scrub aggressively. After cleaning, a thin layer of colourless leather conditioner can help keep it supple.
With faux leather, a light touch with the brush is usually enough. Here, the bigger risk is abrasion if you work too hard. Fabric trainers are more robust, but they still shouldn’t be saturated. Around seams and glued joins, it’s best to be a little more cautious.
When it’s better not to use this method
Delicate specialist materials such as suede, nubuck or very coarse mesh can be more sensitive. On these, sodium bicarbonate may leave visible marks or alter the texture. For such shoes, dedicated cleaners with the right brushes are a better choice.
| Material | Suitable? | Note |
|---|---|---|
| Smooth leather | Yes | Brush gently; consider leather cream afterwards |
| Faux leather | Yes | Don’t rub too hard; test a small area |
| Textile / canvas | Yes | Don’t soak; treat the surface only |
| Suede / nubuck | Rather no | Use specialist brushes and sprays |
Why the effort is genuinely worth it
Cleaning trainers this way can save real money over time. They stay wearable for longer, need replacing less often and are less likely to end up in the bin. That also saves resources, because every new pair means manufacturing, transport and packaging.
There’s a second, practical benefit as well: clean, well-kept shoes make any outfit look more premium. In the office or at appointments, a fresh-looking pair of trainers can make more impact than a new jacket.
A thorough clean once a month, plus quick touch-ups in between as needed, keeps white trainers looking surprisingly “new” for a long time - using just two simple household products many people already have in their cleaning cupboard.

Comments
No comments yet. Be the first to comment!
Leave a Comment