
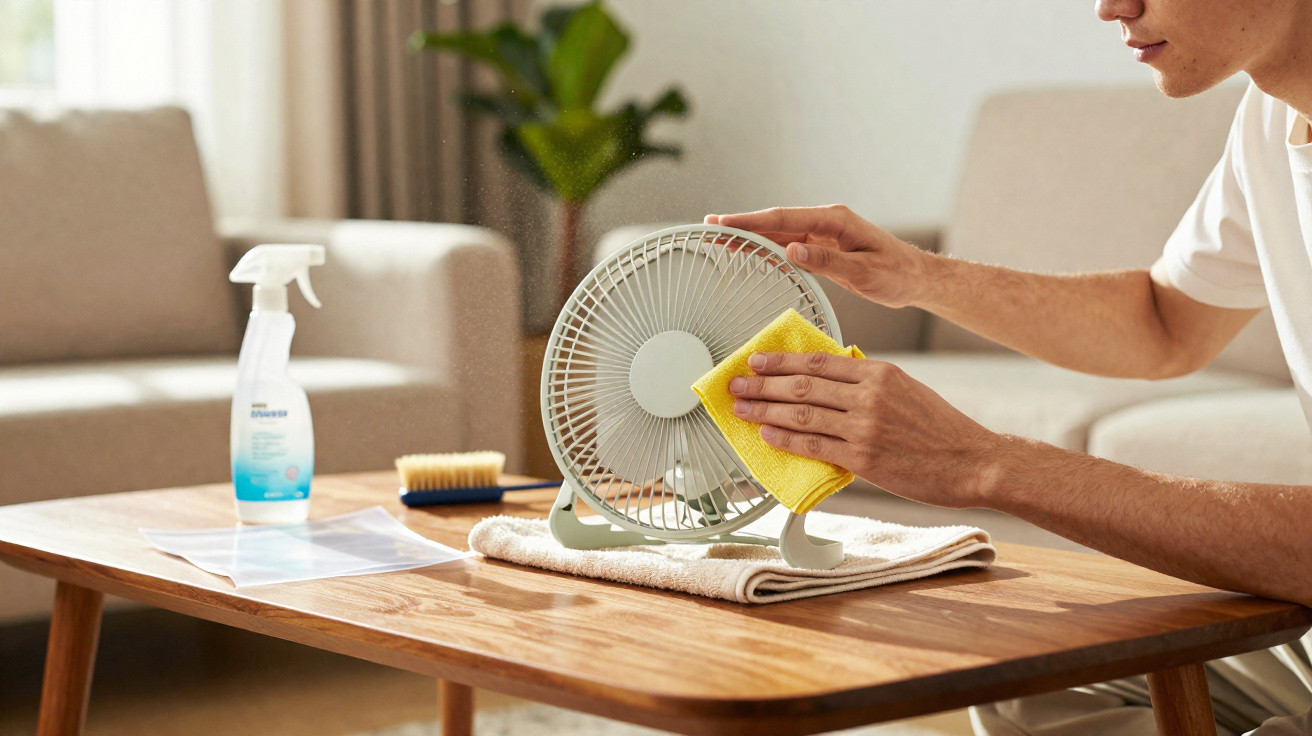
Cleaning fans regularly has stopped being simply a tidy-home habit and become an important way to look after both your health and your living space. When a fan is coated in dust, every turn of the blades throws particles into the room, which can worsen air quality and increase discomfort-especially indoors and for anyone with rhinitis, sinusitis, or other respiratory allergies.
Why is it important to keep the fan clean at all times?
Whenever you switch on a fan, any dust sitting on the blades and grille is blown back into the air, carrying dust mites and other invisible particles around the home. In households with children, older people, pets, or anyone with breathing difficulties, this makes cleaning even more important to help prevent irritated airways and allergy flare-ups.
Keeping the fan clean is not only about wellbeing-it also supports the lifespan of the appliance and helps it run more effectively. Dust in the motor and internal parts can lead to overheating, annoying noises, and weaker airflow, and it may affect electricity use over time.
How to clean a fan in a practical and safe way
To understand how to clean a fan without spreading even more dust around the house, start by unplugging it and identifying the type: desk, pedestal, wall-mounted, or ceiling. Each design calls for slightly different care, but where possible, taking the blades off makes for a more thorough clean and reduces the risk of dirt running into the motor.
For ceiling fans, it is best to use a damp cloth or a suitable duster, taking extra care with height and the electrical parts. Avoid abrasive products and do not use excessive water. Below is a straightforward step-by-step for cleaning desk or pedestal fans safely and without fuss:
- Switch off the fan and unplug it from the socket.
- Remove the front grille, following the clips or screws specified by the manufacturer.
- Carefully take off the blades, noting their position so you can refit them correctly.
- Wipe the blades and grilles with a soft cloth lightly dampened with water and mild washing-up liquid.
- Dry every part thoroughly before assembling the fan again.
How does a protective cover help reduce dust build-up?
Using a protective cover for a fan has become a common option for cutting down the amount of dust that settles on the blades and grille, especially in dustier areas. The cover is placed over the fan when it is switched off, acting as a physical barrier against dust and allowing you to leave deeper cleaning for slightly longer intervals.
In day-to-day home care, this accessory is an addition rather than a replacement for normal cleaning, but it can make routines much easier. To get the most from it, keep a few simple use and care points in mind:
- Remove the cover completely before turning the fan on.
- Wash the cover according to the manufacturer’s instructions, either by hand or on a delicate cycle.
- Check for dust build-up on the inside and clean it when needed.
- Store the fan covered during long periods of non-use, such as in winter.
What is the best frequency for cleaning the fan at home?
The ideal cleaning frequency depends on how often the fan is used and how dusty the room is. However, in very dusty places or where the fan runs heavily every day, a more thorough clean every two or three weeks is usually enough. In better-ventilated spaces with less airborne dirt, intervals of one to two months can work well-as long as you do a regular visual check.
A few practical signs can tell you it is time to clean: a visible layer of dust on the grilles, unusual noises, a dusty smell when you switch it on, or airflow that feels weaker. A simple routine-combining blade cleaning, attention to the motor, and occasional use of a protective cover-helps keep the room more comfortable, with less dust circulating and fans lasting for many summers.

Comments
No comments yet. Be the first to comment!
Leave a Comment