
Strong damp patches, flaking paint, a musty smell: in many homes this is already the norm - yet the underlying cause often remains unclear.
If you leave damp walls unchecked, you usually end up paying the price in mould, higher heating bills and costly repairs. Before you call in tradespeople and drying equipment, there’s a straightforward aluminium foil test that can be surprisingly effective at showing where the moisture is really coming from - outside the building or from within the home.
What the aluminium foil trick is really about
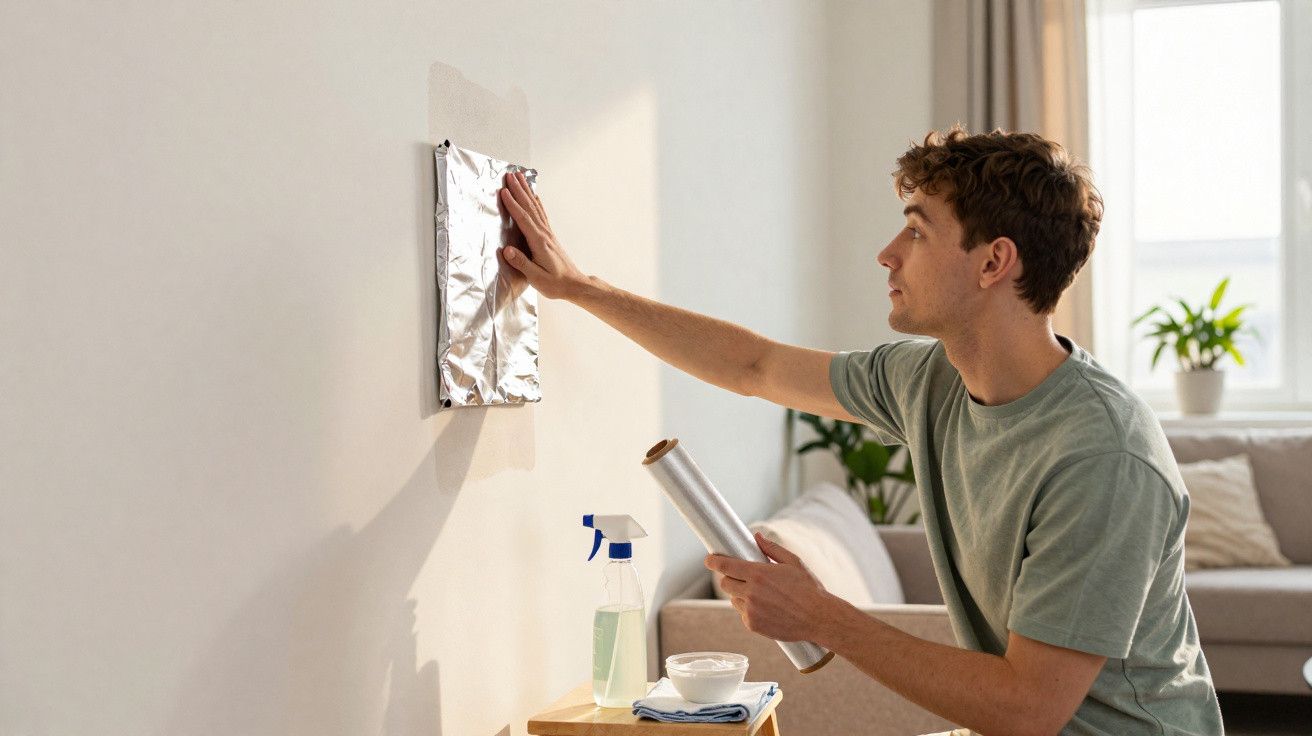
Sticking aluminium foil to a wall can sound like an internet myth at first. In reality, building professionals and surveyors use very similar approaches to gauge moisture. The foil doesn’t fix anything; it simply functions like a small, improvised measuring point.
"Aluminium foil doesn’t help with drying - it helps you understand: is the moisture coming out of the wall or out of the room air?"
This trick won’t replace proper remedial work, but it can stop you tackling the wrong thing first: improving ventilation won’t help if a pipe is leaking, and expensive external tanking won’t solve pure condensation.
Step by step: how the aluminium foil test works
For the test, you only need items most households already have:
- a piece of aluminium foil (standard kitchen foil)
- wide tape or masking tape
- scissors
- 24 to 48 hours of patience
1. Pick a suspicious area
Choose a spot where dampness is already visible - or at least likely:
- dark or yellowish marks on the wall
- paint that is peeling, bubbling or rippling
- a musty or stale smell in the room
- a wall surface that feels colder and slightly clammy compared with other walls
Problems also often develop behind wardrobes or cabinets pushed right up against external walls. If you pull furniture forward briefly, you may find the earliest signs there.
2. Fold and attach the aluminium foil
Cut a piece of foil that’s slightly larger than the suspect area. Then apply it to the wall:
- turn the dull side towards the wall (though it isn’t critical)
- press the foil directly onto the dry wall surface
- seal the edges completely with tape, leaving no gaps
- keep the foil as smooth and tight as possible - no creases and no tears
This creates a small sealed “chamber” that separates the wall surface from the room conditions. Key point: don’t allow draughts to get under the foil, otherwise the result can be misleading.
3. Wait 24 to 48 hours
Leave the foil in place for at least a day - two days is better. During this time, carry on as normal at home: cook, shower, heat the place and ventilate as you usually do.
If you want to keep an eye on something in the meantime, you can occasionally look at the outside of the foil. However, what matters most is what you see when you remove it.
Reading the result: how to identify the cause of damp
After a maximum of 48 hours, carefully peel off the tape and remove the foil. Now check where the moisture is: on which side do you see droplets?
Moisture on the wall-facing side: the problem is coming from outside (or within the structure)
If you find water, damp patches or condensation on the inside of the foil - the side that was pressed against the wall - this points to a building-related or technical issue.
"If the wall-facing side of the foil is wet, moisture is usually being forced into the wall from outside or from the construction."
Possible causes include:
- leaking roof areas or faulty gutters
- cracks in the external render or façade
- rising damp from the ground (especially on the ground floor or in a cellar)
- damaged water pipes or heating pipes inside the wall
- missing or compromised damp-proofing within the masonry
In these scenarios, airing the room and using a dehumidifier usually won’t be enough. Over the medium term you’ll typically need a professional - a plumber, roofer or building surveyor, depending on what you suspect.
Moisture on the room-facing side: the issue is the indoor climate
If droplets or a damp film form on the outside of the aluminium foil - the side exposed to the room air - the wall itself is often sound. In that case, the underlying issue is usually excess humidity in the room.
Common reasons for high indoor moisture levels:
- drying laundry inside the home
- frequent cooking without an extractor venting outdoors
- long, hot showers without rapid airing afterwards
- windows kept shut in well-insulated buildings
- lots of people or plants in small rooms
Here, changes in day-to-day habits are often faster and cheaper than major building work: air the room more often, dry laundry elsewhere, upgrade extraction, and in bedrooms replace leaving windows on the latch overnight with proper, brief ventilation.
Removing damp marks quickly: home remedies with vinegar and bicarbonate of soda
Once you’ve found the cause - or at least narrowed it down - the appearance is the next issue. Light-coloured walls can look scruffy very quickly when grey or dark damp marks appear. Before repainting, you can try a simple mix of white vinegar and bicarbonate of soda (baking soda).
Recipe for marks and odour
You’ll need:
- white household vinegar
- bicarbonate of soda
- a spray bottle or small bowl
- a sponge or soft cloth
- a dry cotton cloth for finishing
Method:
- pour the vinegar into a bowl or spray bottle
- stir in one to two teaspoons of bicarbonate of soda (it may fizz briefly)
- spray or dab the mixture onto the affected areas using the sponge
- leave it for 30 to 60 minutes and avoid scrubbing while it works
- then gently wipe the mark with a soft cloth
- finish by wiping dry and ventilating the room
"Vinegar works against many fungi and bacteria, while bicarbonate of soda absorbs odours and lifts grime - a strong combination for superficial damp marks."
Important: this is better suited to wipeable paint finishes and tiles. If you have delicate plaster surfaces or limewash, test it in an inconspicuous spot first.
When home remedies are no longer enough
If the marks remain after cleaning, or return again soon, there’s usually more going on than a bit of condensation. At that point it’s worth checking more closely:
- are there cracks in the plaster or in the joints above the damp area?
- is the affected wall next to a bathroom or kitchen?
- could a heating or water pipe run near the marked area?
- do the issues become more frequent after heavy rain?
In situations like these, a specialist should verify that pipework and waterproofing are intact. Simply painting over the problem only delays it and increases the risk of health-harming mould.
Why moisture is more than a cosmetic issue
Damp walls don’t just damage wallpaper and plaster - they also affect the indoor environment. Mould spores can spread more easily, particularly in corners that don’t get much airflow. People with allergies or respiratory conditions may quickly react with coughing, irritated eyes or headaches.
There’s also an energy cost: wet building materials conduct heat outwards more readily. The wall feels colder, you turn the heating up, and more energy is lost. Over time, that shows up on your heating bill.
Practical tips to prevent new damp damage
If you want to go a step beyond the aluminium foil test and an initial clean-up, you can adjust a few everyday habits:
- Vent briefly but effectively rather than leaving windows on the latch: open windows fully for 5–10 minutes several times a day.
- Pull furniture a few centimetres away from external walls so air can circulate.
- Dry laundry outdoors where possible, or in well-ventilated rooms.
- When cooking, use lids and (if available) run an extractor that vents outdoors.
- In the bathroom, open the window straight after showering or leave the fan running.
- Buy a hygrometer: 40–60 percent humidity is generally considered a good range in living spaces.
The small aluminium foil test provides the foundation for all of this by showing whether you mainly need to change ventilation habits, or whether a larger structural issue may be hiding behind the plaster. Acting early often saves a lot of stress - and money.
Comments
No comments yet. Be the first to comment!
Leave a Comment