
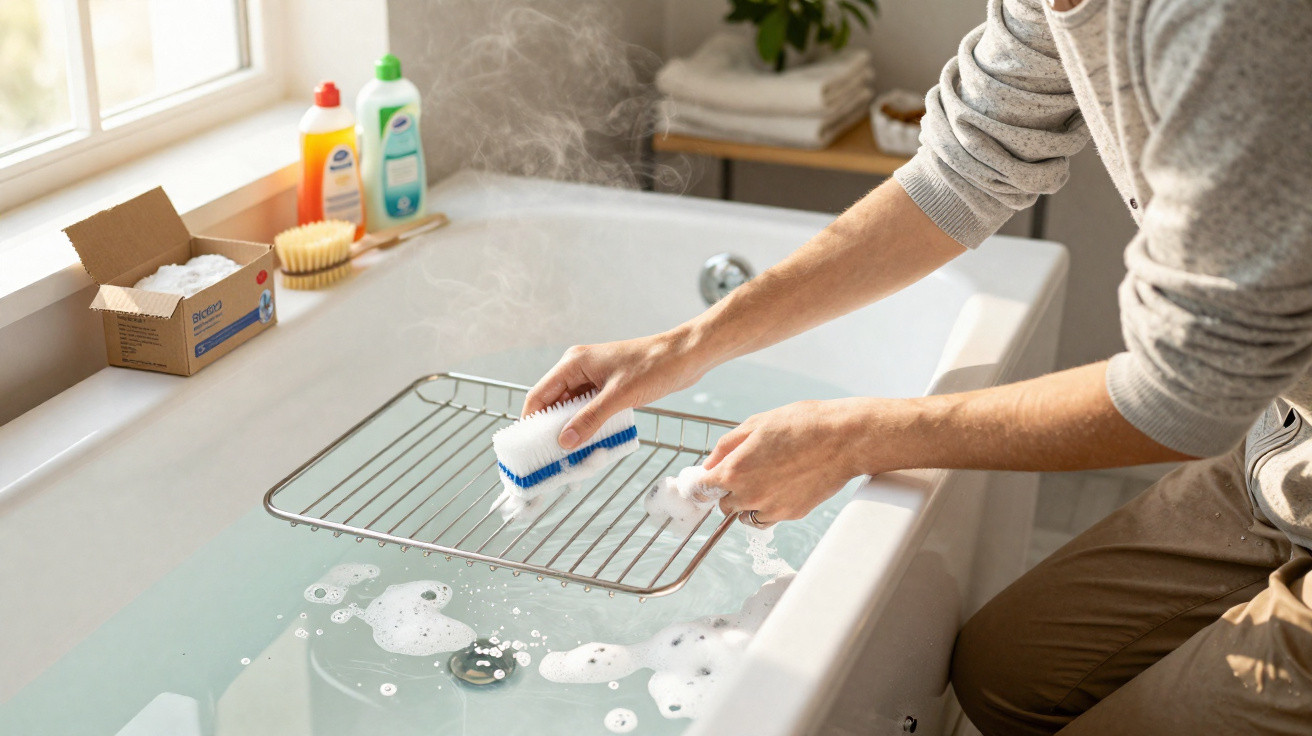
Plenty of people dutifully wipe down baking trays and the oven door glass, yet the chrome oven rack is the one that gets ignored for months. It is bulky, awkward to handle and rarely fits properly in a kitchen sink. The good news is there’s a straightforward method that shifts stubborn baked-on grime without harsh chemicals and without leaving you with aching arms - and most people still don’t know it.
Why the oven rack often gets missed when cleaning
In many kitchens the scene is familiar: the glass looks spotless, the tray shines, and the rack is… not quite there. Anyone who has tried to wash an oven rack in a standard sink will know why. The metal overhangs the basin, water splashes everywhere, some bars sit in water while others stay dry, and you never end up with an even clean.
On top of that, baked-on fat splatters mix with sugar, melted cheese and marinades. The result is a sticky, tough layer that hardens more with every use of the oven. That’s why many people resort to strong oven cleaners with a sharp smell. Those products can damage the metal surface and irritate skin and airways.
"If you clean your oven rack too rarely, you’re giving bacteria, odours and acrid smoke the perfect playground."
The result is that the job gets delayed until the rack simply looks embarrassing. The fix isn’t ever-stronger products - it’s using the right place and a simple combination of household staples.
The unexpected helper for your oven rack: the bathtub
The key trick is to take the rack out of the kitchen and into the bathroom. A bathtub offers what a sink cannot: space. Even large racks can be laid fully flat and completely submerged. No half measures, no constant flipping and turning.
To avoid marking the tub, it’s worth adding a quick layer of protection:
- Put a thick old towel or worn bath sheet on the bottom of the tub.
- Lay the oven rack (or racks) flat on top.
- The gaps between the bars leave enough room for water and the cleaning mix to reach every area.
The towel reduces the risk of scratches on enamel and muffles the clatter when metal meets the tub. If you have a shower-bath with a wide, flat base, that works too - the main thing is that the rack sits level and can be covered entirely with water.
The mix: three ingredients, serious results
Instead of a specialist product, a simple three-part mix is usually enough - and most households already have it:
- very hot water
- bicarbonate of soda (sodium bicarbonate)
- a grease-cutting washing-up liquid
Used together, they work far better than you might expect:
- Hot water softens dried-on food and fat deposits. The heat helps loosen grime from tiny pores and corners where residue clings.
- Bicarbonate of soda is mildly alkaline and gently abrasive. It lifts greasy films without scratching the metal when you later wipe it with a sponge.
- Washing-up liquid breaks fats into smaller particles so they release from the metal and disperse into the water.
A tried-and-tested guideline for quantities is roughly:
- 150 grams bicarbonate of soda
- 50 millilitres washing-up liquid
- enough hot water to fully cover the racks
It does not need to be exact to the gram, but using too little bicarbonate of soda noticeably reduces the cleaning power.
Step by step: how to do the clean
1. Prepare the tub
Spread the old towel, place the oven racks on top, and make sure they are not stacked. If you have more than one, arrange them side by side; if needed, do the job in two rounds.
2. Run in hot water
Fill the tub with the hottest water you can - straight from the hot tap, or boosted with boiling water from the kettle. The water should clearly cover all the bars.
3. Stir in bicarbonate of soda and washing-up liquid
Sprinkle the bicarbonate of soda evenly over the water, then add the washing-up liquid. Gently stir with your hand (ideally wearing gloves) or a plastic spoon until it has dispersed. You’ll get a slightly cloudy solution that may foam a little.
"The clever part: the solution lifts the grime almost by itself, rather than relying on hours of scrubbing."
4. Let it soak
Leave the racks in the bath for at least 30 minutes. For heavy, baked-on layers, it’s worth soaking for several hours or even overnight. As time passes, more residue loosens - and it’s common to see chunks of grease and deposits lifting away.
5. Finish gently
After soaking, a soft sponge or soft brush is usually enough to remove what remains. Many areas will wipe clean with little to no pressure. Avoid metal scourers or steel wool, as they can dull the surface.
6. Rinse well and dry
Drain the tub, then rinse the racks with clean water until there are no visible traces of washing-up liquid. Dry with a tea towel or leave them to air-dry on a towel. Thorough drying helps prevent water marks and surface rust.
Why this method works so well in everyday life
The biggest benefit is how little effort it takes. The mixture does most of the work while you get on with other things. At the same time, you avoid harsh oven sprays that can linger in the air or irritate your breathing.
Another advantage is that the protective finish on the metal is less likely to be damaged. Highly abrasive powders or stiff brushes can roughen the surface, making it easier for grime to stick in future. The bathtub approach greatly lowers that risk.
- fewer harsh products in the kitchen
- no awkward arm-stretching in a cramped sink
- better hygiene because the rack bars are fully wetted
- far less smoke the next time you bake
How often is it worth doing?
If you bake or grill regularly, a consistent routine pays off. A sensible schedule could be:
- for occasional use: every 2–3 months
- for frequent use (for example, bakes and cheese-heavy dishes): every 4–6 weeks
- after very fatty meals such as chicken or ribs: once again straight afterwards
This stops multiple layers building up. The fresher the dirt, the faster it comes off.
What to consider for materials and safety
This method suits standard chrome-plated or enamelled oven racks. If you have a rack with a special coating, it’s wise to check the manufacturer’s guidance first. Areas that are already damaged or rusted need extra care: use particularly soft sponges and minimal pressure so you do not expose more bare metal.
Bicarbonate of soda can irritate skin on contact. Thin household gloves help protect hands and nails. If you have small children or pets, keep the bathroom closed while the racks soak so nobody can get into the solution.
Practical extras for a cleaner kitchen
A bit of prevention while cooking reduces how often you need a deep clean. A few easy habits make a clear difference:
- Place a baking tray lined with baking paper or a reusable baking mat beneath the rack to catch drips.
- Let meat and vegetables drain briefly before they go into the oven.
- For very fatty dishes, put a dish with a little water under the rack - it helps catch dripping fat.
- Wipe light splashes off the rack with a damp cloth once it has cooled, before they bake on.
That way, the big “bathtub session” becomes necessary far less often.
Why natural options can be better long term
Bicarbonate of soda and washing-up liquid tend to break down in wastewater more readily than many aggressive oven sprays. That means fewer fumes and fewer fragrances in your home. If you are sensitive to chemicals, you get two benefits: less irritation and less odour, while still seeing a clear effect.
This style of cleaning can also be kinder to the oven itself. When coatings are intact and racks are looked after, heat is more even, there’s less of a burnt smell, and bread, pizza and bakes simply taste better because old greasy vapours are not rising back up into the food. What feels like a dreaded chore becomes a semi-automatic routine you can fit into everyday life - with a noticeably cleaner result.


Comments
No comments yet. Be the first to comment!
Leave a Comment