
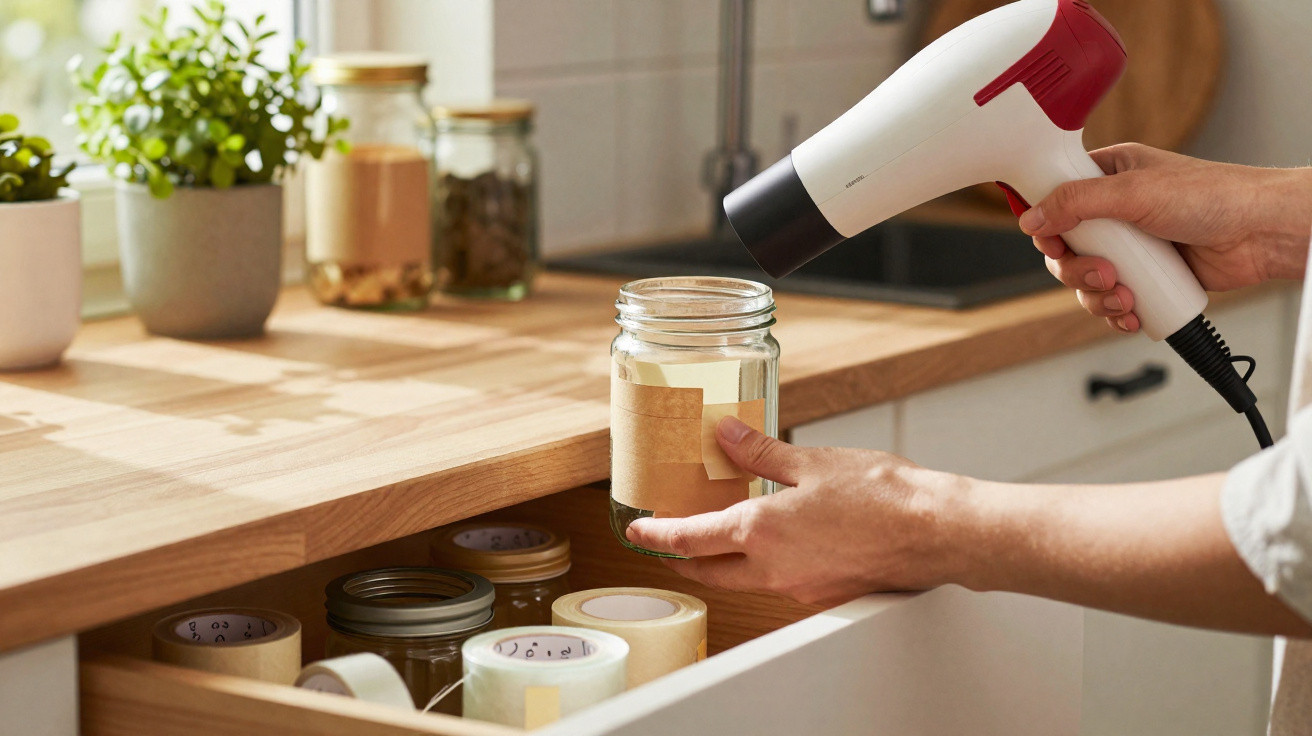
Many people react the same way on instinct: they scratch at it with a fingernail-harder and harder, getting more irritated by the second. What you’re left with is a dull patch, stubborn glue residue and a foul mood. Yet the answer is usually already sitting in a drawer, and it only needs two completely ordinary household helpers.
Why fingernails almost always lose against adhesive labels
A scratching session can feel reassuringly precise: it seems like you’re in control. In reality, a fingernail is a small, uneven scraper. On glass you might get away with it, but on stainless steel, plastic or painted surfaces it’s easy to create fine scratches.
That’s where the frustration really starts. The area looks flat, the shine disappears, and the surface feels different to everything around it. At the same time, the label tears into tiny bits. What remains is a messy combination of paper fluff and adhesive-typically a sticky film that instantly attracts dust and grime.
"The longer you scratch, the bigger the mess becomes-and the harder the clean-up afterwards."
There’s also this: many adhesives are designed to last. They change over time. Heat can make them harder or rubbery, while cold can make them brittle. A label that has been stuck to a bottle for months behaves very differently from one that’s just been applied.
The surface underneath matters just as much. On lightly textured plastic, the glue creeps into tiny grooves. On cardboard, it migrates into the fibres. Pure force rarely helps. What does make the difference is a combination of targeted warmth and controlled grip-and that’s exactly where the drawer duo comes in.
The drawer success duo: tape and a hairdryer
These two helpers are found in most homes: a piece of tape (parcel tape works best) and a standard hairdryer. Used together, they act like a mini professional label remover.
Why tape is the secret star here
Tape obviously sticks, but in this case it has a different job: it should grab the label as evenly as possible so it comes off in one piece.
- Lay the tape flat and taut across the entire label.
- Press it down firmly from the centre outwards using your fingers or a cloth.
- If the label is larger, apply several strips with slight overlap.
This allows the tape’s adhesive to bond with the paper face of the label. Instead of all the pulling force concentrating on a tiny corner that tears immediately, the force is spread over the full surface. That drastically reduces the risk of the paper shredding.
Heat from a hairdryer: soften the adhesive instead of rubbing it off
The hairdryer adds the second crucial effect: warmth. Heat softens the glue so it grips less aggressively. Just a few seconds can shift it from “rock solid” to “co-operative”.
Correct use matters:
- Set the hairdryer to a medium setting.
- Blow at the label from roughly 15 to 20 centimetres away.
- Keep the airflow moving gently across the area-don’t focus on one spot.
"First press the tape down well, then apply short, even heat-and the label often lifts off in a single pull."
Compared with boiling water or sharp tools, the temperature is far easier to control, and the material underneath is put under far less strain.
The 30-second method: how to remove a label cleanly
If you remember the order, you can usually avoid harsh cleaners and endless rubbing. In practice, do this:
- Apply the tape: Cover the label completely, overlap strips, and press down thoroughly.
- Warm it: Use the hairdryer for a few seconds, moving evenly across the taped area.
- Peel off: Pull the tape off slowly, keeping a shallow angle to the surface.
That shallow angle is the small but crucial trick. Pulling almost parallel to the surface lifts the label like a film rather than yanking it upwards. This helps the adhesive release evenly across the whole area.
Speed also matters. Too fast and the label tears. Too tentative and parts can stick down again. The best approach is a calm, steady pull-like removing a plaster, only far more relaxed.
How to treat different materials
Glass and ceramics: it hardly gets easier
Bottles, storage jars, mugs or ceramic bowls are ideal for this method. The surfaces are smooth, heat-resistant and tough.
Tips for these materials:
- Work on the label while it’s dry, rather than soaking it for ages first.
- A brief warm-up is enough-don’t blow-dry for minutes.
- After peeling, finish with warm washing-up water.
This makes empty jam jars or bottles ready for new contents in no time-whether for pantry staples, homemade sauces or as decorative pieces.
Plastic and stainless steel: be gentle with heat
Plastic needs a bit more care. Some plastics can warp or develop unsightly marks if the air is too hot or held too close. Work in short bursts and rest your hand on the surface in between: if it feels warm rather than hot, you’re in the safe zone.
When it comes to tape, avoid ultra-strong specialist varieties. Standard parcel tape is plenty. On stainless steel, this method prevents exactly what scouring pads and metal blades often cause: fine scratches that never truly polish out again.
Cardboard, paper and painted wood: gentler, flatter, slower
Sensitive surfaces such as gift boxes, book spines or lacquered furniture react far more readily. Here’s what to do:
- Use heat briefly and in stages.
- Before using it, press the tape once onto fabric to slightly “de-tack” it.
- Pull at an even shallower angle and watch closely for fibres lifting.
If you notice the surface starting to suffer, stop immediately, warm it lightly again, and work in smaller sections. The aim remains the same: the adhesive should give way-not the coating.
What to do about leftover glue, smears or smell
Occasionally, a thin film of adhesive remains even with careful removal. When that happens, repeat the same process on a smaller scale: warm briefly, press on a fresh piece of tape, then peel.
"The tape works like a small magnet for softened adhesive residue-no smearing, no little rolled-up bits."
Rubbing hard while dry often just balls the glue up and spreads it around. It’s much easier with clear, material-appropriate steps:
| Material | Gentle follow-up cleaning |
|---|---|
| Glass / ceramics | Hot washing-up water, soft sponge |
| Stainless steel | A small amount of alcohol-based cleaner on a soft cloth, then clear water |
| Plastic | Test first on an inconspicuous corner, clean gently with washing-up liquid |
| Lacquered wood | Damp cloth, mild cleaners only, avoid pressure |
A small drop of cooking oil on a cloth can help with particularly stubborn, greasy adhesives. Afterwards, wash thoroughly with washing-up liquid so no slick film is left behind. Strong-smelling solvents are best kept as a last resort-and only on materials that can tolerate them.
Extra everyday benefits: upcycling, organisation and less frustration
When labels come off without drama, you tend to keep and reuse more items. Empty jars stop going straight into the recycling and instead end up in the cupboard. Gift packaging can be used several times without old price stickers spoiling the look.
There’s a practical bonus in bathrooms and offices too: storage boxes suddenly look far more premium when there aren’t half-picked remnants still stuck to them. Even second-hand purchases-such as decorative items or kitchen gadgets-can be quickly cleaned of old sticker marks.
At the same time, you’ll rely less on specialist chemicals. Once you’ve seen how effective warmth and a simple strip of tape can be together, you’re less likely to reach for aggressive sprays. That’s kinder to surfaces, kinder to your nose, and often kinder to your wallet as well.
It also raises an interesting question: which other small drawer combinations can achieve similarly useful results-such as rubber gloves and a microfibre cloth for smooth shower screens, or a cocktail stick and cotton buds for hard-to-reach gaps. The principle stays the same: instead of brute force, a smart mix of grip, temperature and the right tool often does the job-and it’s usually already at home in the next drawer.

Comments
No comments yet. Be the first to comment!
Leave a Comment