
The moment you properly clock how filthy your light switches are is rarely a proud one. It tends to happen just after you’ve tackled everything else. The kitchen still carries a lemony freshness, the living room has been hoovered, the bathroom is gleaming… and then you spot that small plastic rectangle on the wall. Smudged grey fingerprints, a faint yellowish ring, and a few dark specks you’d rather not think too hard about. In an instant, the whole house feels less “done”.
You press it… and immediately wish you hadn’t.
That’s usually when an old childhood scene pops up: your grandmother with a damp cloth, gliding briskly from room to room, giving each switch a quick wipe until it looked bright and blameless again. She wouldn’t have called it a hack. It was simply what you did.
In those two square centimetres of plastic sits a whole tale of routine, unseen grime, and a low-level revulsion.
And once it’s caught your attention, you can’t ignore it again.
Why light switches get so gross (and why we ignore them)
Light switches may be small, but they take a beating. Every hand in the house uses them: hands that have been cooking, hands that have emptied the cat litter, hands that have just held the rail on the Tube. Then add a bit of kitchen steam, some bathroom damp, and a fine drift of dust from the hallway. Before you know it, the switch becomes a sticky landing pad for all the things you’d rather pretend don’t exist.
Even so, we stroll past them dozens of times a day. Flick on the light and carry on. Your brain simply blanks them out - much like that creaky door you stop noticing until a visitor mentions it.
A friend once described her move-out day in a rented flat. The landlord arrived for the classic “white glove” inspection. He ran a finger along the window frames, opened the oven, peered behind doors - and then paused in the hallway, staring at the light switches.
They were almost brown.
He didn’t shout. He just looked at her, then at the switch, then at the cleaning checklist on his clipboard. “These,” he said, “tell me how people really live.” She spent the next 20 minutes scrubbing them, half mortified and half amazed that something so tiny could suddenly carry so much weight.
There’s a simple reason we overlook them. They don’t demand attention like laundry piles or a sink full of plates. They’re the quiet kind of dirt - hidden in plain sight. Cleaning them can feel unnecessary, even a bit fussy, until you remember they’re among the most touched places in the home.
Let’s be truthful: hardly anyone does this every single day.
Still, a spotless light switch shifts the feel of a room. It’s like giving the walls a fresh haircut. And that’s exactly where the old-fashioned methods shine. Grandmothers knew how to make plastic look new with next to nothing, and their little routine had an odd bonus: the house felt more like home when they’d finished.
Grandma’s 7 tricks to clean a light switch like new
Grandma’s top rule never changes: safety comes before shine. Start by switching the light off, and if you’re at all uneasy, isolate the circuit at the consumer unit. She’d likely raise an eyebrow and tell you, “We don’t play with electricity.”
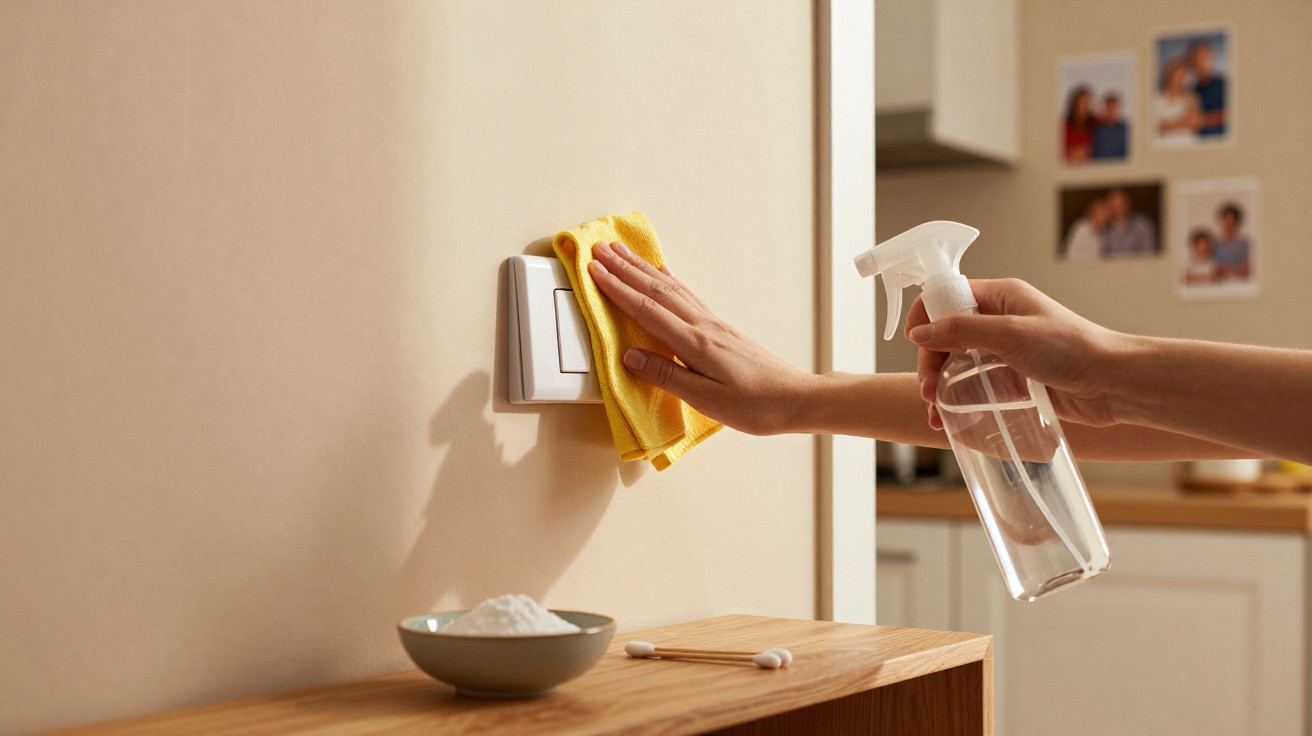
Then comes the straightforward bit of magic: a soft microfiber cloth, slightly dampened with warm, soapy water. Not wet, not dripping - just barely moist. She’d fold the cloth over a finger and wipe from the top of the faceplate down. Slow and steady, small circular motions, and no water creeping into the gaps.
Even this step alone removes a surprising amount of grime - and you still haven’t reached for anything fancy.
The second trick is for switches that have gone dull, stained or yellowed, especially in kitchens where airborne grease settles invisibly over time. That’s when washing-up liquid stops being enough. Grandma would grab a small bowl, add a splash of white vinegar, and dilute it with warm water. Vinegar slices through grease like a quiet warrior.
If the dirt is clinging around the edges, she’d take that vinegar-damp cloth and wrap it around a cotton bud or the tip of a butter knife, then carefully trace the outline where dust and grease like to hang on for dear life. One run around, and that grey line is suddenly gone - along with the thin border between “lived in” and “neglected”.
Next is the detail most people miss: texture. Plastic marks easily if you go at it with a rough scouring sponge. Those tiny scratches hold onto dirt, and the switch never quite looks clean again. That’s why she always chose something gentle - microfiber, an old cotton T-shirt, a well-worn tea towel.
That same “soft touch” rule leads into trick number three: mixing baking soda and water into a paste for those long-set yellow stains on white switches. Dab on a little, massage it lightly with your fingertips, wipe away with a clean damp cloth, then dry immediately. No soaking, no aggressive scrubbing as if you’re sanding timber. Just time and care. The plastic brightens gradually, and it’s oddly satisfying - like wiping away a decade of half-hearted cleaning.
How to keep them clean longer (without becoming a neat freak)
The key to switches that stay presentable is simple: don’t wait for them to become revolting. It sounds obvious, but day-to-day it’s easy to miss. The grandmother-approved approach is uncomplicated. Once a week, when you already have a cloth out for dusting or mopping, spend an extra 10 seconds in each room and give the switches a quick wipe. No fuss, no special occasion.
Some people even make it a small ritual: every Sunday evening, a brisk loop around the house with a barely damp cloth and a single drop of washing-up liquid. Living room, bedrooms, bathroom, kitchen. Tap, tap, tap. Finished. It’s almost calming. You’re not doing a deep clean - you’re stopping the horror before it appears.
The usual mistake is overdoing it. You notice how grimy the switches are, feel a pang of guilt, and go too hard: strong bleach, abrasive powders, cloths so wet they drip into the mechanism. That’s when you risk scratching the plastic, fading the colour, or worse, getting moisture where the electrics are.
Be kind to yourself - and to the paintwork. A light touch beats brute force. If you live with others, you can even turn it into a tiny game: who can find the dirtiest switch this week? No judgement, just curiosity. Dirt happens. The aim is to turn “ugh” into a two-minute habit, rather than a dreadful task you avoid for months.
“Clean switches don’t scream ‘perfect house’. They whisper ‘someone cares about the details’,” my grandmother once said, wiping a hallway switch with the same seriousness she gave to the Sunday roast.
- Trick 1: Turn off the light, use a slightly damp microfiber cloth with a drop of mild washing-up liquid.
- Trick 2: For grease and kitchen grime, wipe with diluted white vinegar, then dry carefully.
- Trick 3: For yellowed plastic, gently rub a baking soda paste, then rinse with a damp cloth.
- Trick 4: Use cotton buds or a toothpick wrapped in cloth to clean the outline and tiny crevices.
- Trick 5: Avoid abrasive sponges and neat bleach to protect the surface and colour.
- Trick 6: Finish by drying with a soft, dry cloth to prevent water marks and new dust from sticking.
- Trick 7: Add switches to your weekly quick-clean circuit so they never reach the “disgusting” stage again.
Beyond the plastic: what clean switches say about a home
Once you start paying attention to light switches, you notice them everywhere. In friends’ homes, in rented flats, in hotel rooms that aim for luxury yet hide a greasy switch by the bathroom door. You don’t judge - you just read the space differently. That little square of plastic becomes a quiet signal of how a place is used, and how much care it receives.
There’s also something strangely personal about wiping them down. Your fingertips follow the same path people have taken for years, turning darkness into light in that exact spot. It’s a kind of domestic archaeology. You’re not only cleaning - you’re refreshing the story of the room.
For some, these seven tricks are simply practical cleaning tips. For others, they’re a small way to regain control when everything else feels chaotic. You can’t sort your inbox or fix the news cycle in five minutes, but you can bring a touch of order back to the wall in front of you - one clean switch at a time.
You might even hand these little habits on, just as your grandmother did, without ever calling them “grandma-approved hacks”. Just a cloth, a bit of vinegar, and a routine.
And perhaps the next time someone visits and casually flicks on the light, they’ll register that bright little detail and feel something they can’t quite put into words: that this home is quietly, thoroughly cared for.
| Key point | Detail | Value for the reader |
|---|---|---|
| Safe, gentle cleaning first | Use a barely damp cloth, mild soap, and cut power if needed | Reduces risk of electrical issues and damage to switches |
| Targeted stain removal | Vinegar for grease, baking soda paste for yellowing and stubborn marks | Helps restore switches to a “like new” look with simple ingredients |
| Turn it into a habit | Quick weekly wipe as part of regular cleaning routine | Keeps switches from ever reaching the “disgusting” stage again |
FAQ:
- How often should I clean my light switches? Once a week is ideal for a quick wipe, and a slightly deeper clean once a month if you cook a lot or have kids.
- Can I use disinfectant wipes on switches? Yes, as long as they’re not soaking wet and you don’t let liquid drip into the mechanism; always pass a dry cloth after.
- Is bleach safe for white switches? Occasionally and very diluted, but frequent use can yellow plastic over time, so mild soap and baking soda are usually better.
- What if my switches are already yellowed with age? Baking soda paste can improve the look, but very old plastic sometimes stays slightly tinted; at that point, replacing the cover might be the cleanest solution.
- Do I really need to turn off the power? For simple surface wiping with a barely damp cloth, turning the light off is usually enough, but cutting power at the breaker adds an extra safety layer if you’re anxious or cleaning near openings.




Comments
No comments yet. Be the first to comment!
Leave a Comment