
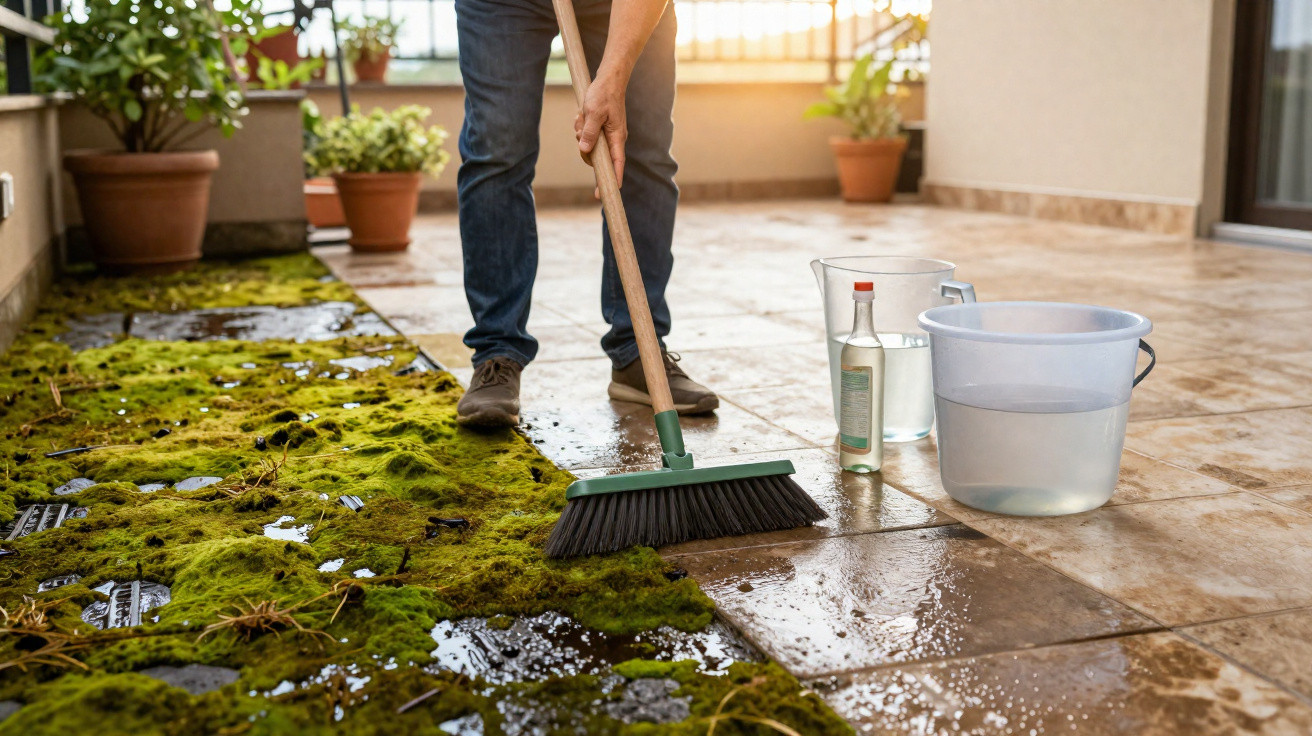
After months of cold, wet weather, stepping back on to the patio often brings an unpleasant surprise: green growth, black marks and slippery slabs. Many people then reach for pricey specialist cleaners or hire a pressure washer. In plenty of cases, though, a humble supermarket staple does the job - one that costs under 40 cents and most people already have at home.
How a “green slip-and-slide” turned back into a patio
The situation will feel familiar: winter finally ends, the sun reappears - and the patio looks as if a carpet of moss and algae has been sitting there for months. Chairs skid about, children are better off not playing outside, and even a barbecue night feels out of the question.
At the DIY shop you’ll find large canisters of anti-green growth treatments stacked high, promoted with dramatic before-and-after photos. They are not cheap, and they come with warning labels: wear protective gloves, harmful to aquatic life. If you don’t own a pressure washer, you also have to hire one - another expense, not to mention the hassle of lugging it around.
That is exactly where one homeowner changed tack: a first-hand account by a British journalist and a simple bottle of clear household vinegar costing the equivalent of 0.35 euros became the starting point for a surprisingly straightforward patio-cleaning experiment.
"A mix of water and clear household vinegar cleaned a filthy patio in about an hour - with no pressure washer at all."
The vinegar method: how this low-cost patio clean works
The journalist whose experience the account draws on has used clear household vinegar as an all-purpose cleaner for years. For her patio, she follows an easy routine that’s simple to copy.
Step 1: Sweep thoroughly
Before any wet cleaning, she gets rid of loose debris:
- Clear the entire patio (furniture, pots, decorations)
- Sweep the whole area using a stiff-bristled broom
- Remove leaves, twigs, loose soil and heavy dirt
- Go over joints and corners several times
The reasoning is straightforward: the less loose dirt sitting on the slabs, the more directly the vinegar solution can work later on moss, algae and dark surface films.
Step 2: Mix the vinegar solution
Next comes the “miracle product” - clear household vinegar from the supermarket. Two things matter here: the mixing ratio and the water temperature.
The journalist combines:
- 1 part clear household vinegar
- 1 part water
She pours both into a bucket and gives it a strong stir. The water should not be too hot - lukewarm or cool is better. Very high temperatures can affect the vinegar content, and they are not ideal for many outdoor surfaces anyway.
Step 3: Apply the solution and leave it to work
Now the mixture is applied generously. Depending on the size of the patio, that can be done using a watering can, a cup, or straight from the bucket. The key point: don’t just target individual spots - let the liquid spread as evenly as possible across the whole patio.
The account says the solution is concentrated on the darkest, greenest patches. It’s fine if a small puddle forms there. After that, everything is left for around an hour.
"After about 60 minutes of contact time, the green coating could be lifted with an ordinary broom with almost no effort."
Step 4: Scrub instead of blasting with high pressure
Once the hour is up, it’s back to the broom - this time for scrubbing. Using a stiff-bristled broom or scrubbing brush, the slabs are worked in strips. The journalist reports that the build-up loosened surprisingly easily, with many areas looking noticeably lighter after only a few passes.
For stubborn marks, a second pass with a bit more pressure can help. If you like, you can rinse with clean water afterwards - particularly if children walk across the area barefoot or pets use the patio.
Costs: vinegar vs specialist patio cleaners
Cost is a deciding factor for many households. In the original account, a bottle of clear household vinegar cost just under 30 pence - around 0.35 euros. About half a bottle was enough for a medium-sized patio. By comparison, many specialist green-growth removers work out far more expensive.
| Product type | Approximate cost | Coverage |
|---|---|---|
| Clear household vinegar | approx. €0.70 / litre | depends on dilution and patio size |
| Anti-green growth in a canister | approx. €3.99 / 5 litres | up to 50 m² according to the manufacturer |
At first glance, some canisters can even look cheaper per litre. However, they often contain biocides - highly active chemical agents designed to kill organisms. These products call for protective gloves and, in some cases, eye protection, and they should only be used in dry, calm conditions. Pets and children should stay off the surface until it has completely dried.
Clear household vinegar is also an active substance that alters habitats - for example, for moss or weeds. Compared with many specialist chemicals, though, it is generally considered much less problematic and is widely used in the home.
Where vinegar makes sense on patios - and where it doesn’t
Clear household vinegar is acidic. That acidity is exactly what helps loosen many deposits and natural build-ups. At the same time, not every surface tolerates acid equally well.
Suitable surfaces
- Concrete slabs: the method often performs particularly well here because the surface is robust.
- Frost-resistant outdoor tiles: with typical porcelain stoneware or ceramic outdoor tiles, the vinegar solution generally works without issues.
- Grouted areas: in joints, the vinegar solution can also weaken small weeds, making them easier to remove.
Take care with delicate natural stone
Experts advise against using acidic cleaners on certain stones, especially:
- Marble
- Polished granite
- Limestone and other calcium-rich natural stones
On these surfaces, acid can etch, discolour or leave a dull finish. If you are unsure, test the vinegar solution in an inconspicuous corner or ask a specialist retailer for advice about your specific paving.
Practical tips if you want to try it
If you plan to clean your patio using the vinegar method, a few real-world pointers help:
- Pick a dry day: ideally choose a day without rain so the solution can work undisturbed.
- Avoid direct midday sun: strong sun dries the liquid too quickly and reduces effectiveness.
- Wear old clothes: splashes can bleach fabric.
- Keep pets away briefly: animals should not walk over the patio until the area is dry again.
- Expect the smell: the vinegar odour fades, but it can be quite strong during use.
If you want, you can rinse again with clean water once the patio has dried. This is particularly sensible if children are often outside barefoot.
How often it’s worth doing, and what alternatives exist
The experience described suggests that one thorough clean is often enough for a whole season. Growth will return naturally, especially in shaded, damp areas. In those spots, it helps to remove leaves regularly and give the patio a quick sweep now and then, rather than leaving it untouched for months.
People with large plots or very weathered paving sometimes still rely on pressure washers. They are fast, but they can wash out joints or roughen sensitive surfaces. A vinegar solution used with a broom is much gentler and does not require electricity or heavy equipment.
For heavily textured natural stone, some users find drill brush attachments or specialist scrubbers more effective. Here too, the vinegar solution can be used as a pre-treatment to help loosen the build-up.
Risks, limits and sensible combinations
As simple as the method is, it has clear limits. Deep, oily stains or rust discolouration usually cannot be removed completely this way. In those cases, other specialist cleaners suited to the material are a better choice.
If you live in an area with strict rules on using cleaning products outdoors, it is worth checking local requirements. Some councils have guidance on letting wash water run into drains or gutters.
A practical approach is to combine this with light, regular upkeep: remove leaves, sweep dry during prolonged wet spells, and after especially damp periods do a shorter, quick pass with diluted vinegar. That helps prevent the patio becoming overgrown and slippery again.
Overall, the account shows that you do not need to spend hundreds of euros on equipment or chemical canisters to make a heavily soiled patio usable again. With a simple household staple, a bit of time and a sturdy broom, you can achieve a surprising amount - and often in just a single hour of work.
Comments
No comments yet. Be the first to comment!
Leave a Comment