
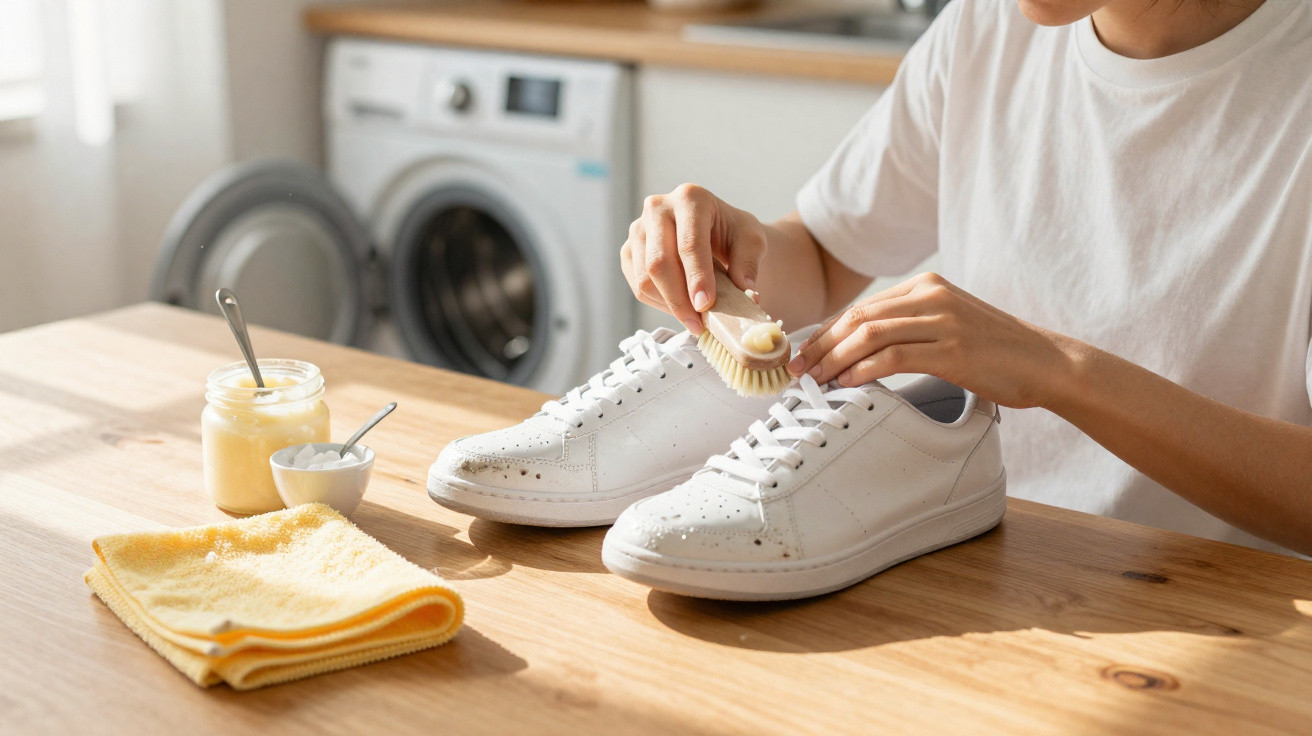
Putting your trainers straight into the washing machine might feel like the quickest fix, but it often shortens their life far sooner than you’d expect. A simple method using two familiar household staples can bring white trainers back to a bright finish - without pricey specialist products and without putting glue, stitching or fabrics at risk.
Why the washing machine harms your white trainers
Heat, friction, damp: the quiet material destroyers
A 30°C cycle sounds gentle. For trainers, it rarely is. During the spin, they repeatedly slam against the drum, get kneaded and twisted, and stay saturated for an extended period.
"The combination of friction, warmth and constant moisture puts huge strain on glue, stitching and shape."
The bonding layer between the sole and the upper softens, loses grip and can later come away. Seams are subjected to pulling forces they were never designed to handle. Even if the shoes look cleaner afterwards, structurally they’re already compromised.
The cleanliness illusion: why yellow marks still appear
There’s another drawback: the machine doesn’t only rinse dirt out - it can also drive it further into the fibres. Water penetrates deep into textiles or leather, particles spread through the material and then get trapped.
Common results include:
- yellowish tide marks after drying
- grey dull patches on what used to be crisp white fabric
- detergent residue that behaves like a magnet for fresh dust
So, anyone hoping a quick wash will save time often ends up with trainers that look dirty again even faster on the next walk around town.
The natural “power mix” that makes expensive cleaners unnecessary
Sodium bicarbonate: gentle abrasive and brightener
A better option is usually already in your kitchen cupboard: sodium bicarbonate (bicarbonate of soda), the familiar baking ingredient. Its fine powder acts like a very mild scouring pad.
The tiny crystals help lift grime from:
- the weave of mesh and fabric
- the pores of faux leather and leather
- the fine grooves of a rubber sole
At the same time, it has a subtle whitening effect. Light yellowing fades and the white looks fresher, without stripping or damaging the material.
Soft soap paste: cuts grease and keeps materials supple
Pair it with a soft, plant-oil-based soap paste, often sold as traditional household soap. It commonly contains oils such as olive, linseed or sunflower.
"The soap loosens greasy marks, road film and grass, while the oils help keep the material flexible."
Unlike harsher cleaners, this type of soap doesn’t dry out leather or faux leather - it helps protect the surface. The shoe stays more pliable, and cracks in the upper tend to appear much less often.
How to mix the cleaning paste in two minutes
To make one batch of cleaning paste, you’ll need:
- 2 tablespoons sodium bicarbonate (powder)
- 1 tablespoon soft soap paste
The right texture: thick is better than runny
Put both ingredients into a small bowl and stir until you get a dense, creamy paste - slightly firmer than toothpaste. It should cling to the shoe rather than drip off.
If it’s too loose, add a little more powder. A gentle fizzing is a sign the ingredients are combining and becoming active. That thicker texture is also what helps prevent the trainer from soaking up excess water.
Why using less water is the real key
The less liquid that gets into the shoe, the lower the chance of:
- the shape warping
- yellow water marks forming
- glued areas softening
The paste is meant to work mainly on the surface - that’s where the visible dirt sits, not deep inside the sole.
Apply it properly: step by step back to white trainers
Target the worst areas with a brush
An old toothbrush or a soft nail brush is ideal. Dab on a small amount of paste and work on the dirty sections using small circular motions.
"Be especially thorough on the rubber sole and in the creases of the upper."
That’s where road dust and grime love to build up. Spend time on stitching, the join between sole and upper, and around the toe cap. The more evenly you work, the more consistent the final finish will look.
Let it work instead of scrubbing yourself exhausted
Once the problem areas are covered with a thin layer, put the brush down and leave it for around 15 minutes. During this time:
- the soap can loosen grease and dark marks
- the powder can develop its brightening effect
Many people clean trainers too aggressively and scrub nonstop. This method depends far more on dwell time than brute force.
Gentle wiping beats a full rinse
Microfibre cloth instead of turning on the tap
For the final stage, use a soft microfibre cloth. Dampen it slightly, wring it out well, then wipe away the paste using small movements.
Rinse the cloth repeatedly so you don’t smear residue back onto the shoe. This way you control the water precisely - unlike holding trainers under a running tap, which soaks them through again.
Dry slowly: no hairdryer, no radiator
To dry, place the trainers somewhere airy and shaded. Direct sunlight, radiators and hairdryers can make materials brittle and encourage yellow discolouration.
"Stuffing the shoes with scrunched-up newspaper speeds drying and helps the shape hold."
Leather and faux leather styles in particular benefit from this slower, more even drying process, often lasting noticeably longer as a result.
How to keep trainers white for longer
A protective layer against mud, rain and road dirt
Once the shoes are fully dry, an impregnation spray is worth considering. A fine barrier coats the fabric and upper so moisture and grime bead off more easily.
That not only reduces new stains, it also increases the time between deep cleans. With regular waterproofing, you’ll need the brush far less often.
A mini routine after every wear
Rather than waiting until trainers turn properly grey, a quick tidy after wearing them makes a big difference. Many marks lift easily while they’re still fresh.
Useful options include:
- a slightly damp cloth for dust and splashes
- dedicated magic erasers for the rubber sole
This keeps the base colour brighter for longer and helps prevent stubborn staining from forming in the first place.
What to consider for materials and types of stain
Fabric, leather, faux leather: not every upper reacts the same
This paste works well on smooth surfaces and hard-wearing fabrics. For very delicate materials or suede/nubuck, it’s best to test first on an inconspicuous area.
Smooth leather usually benefits from a light application of care cream after cleaning. With trainers made from coarse fabric, a second pass with a small amount of paste may be needed to reach deeper fibres.
Judging stain types correctly
With white footwear, it’s especially helpful to identify what caused the discolouration:
| Type of stain | How the household mix performs |
|---|---|
| Soil and dust | lifts very well; one round is usually enough |
| Grease and oil | reduced noticeably by the soap; often barely visible afterwards |
| Grass stains | lightens; older marks may need several rounds |
| Paint splashes | often only partly removable; acting quickly helps |
Anyone who tries this combination of powder and soft soap paste quickly realises: clean, almost like-new white trainers aren’t a luxury - they mainly come down to using the right method, not buying the most expensive bottle from the chemist.

Comments
No comments yet. Be the first to comment!
Leave a Comment