
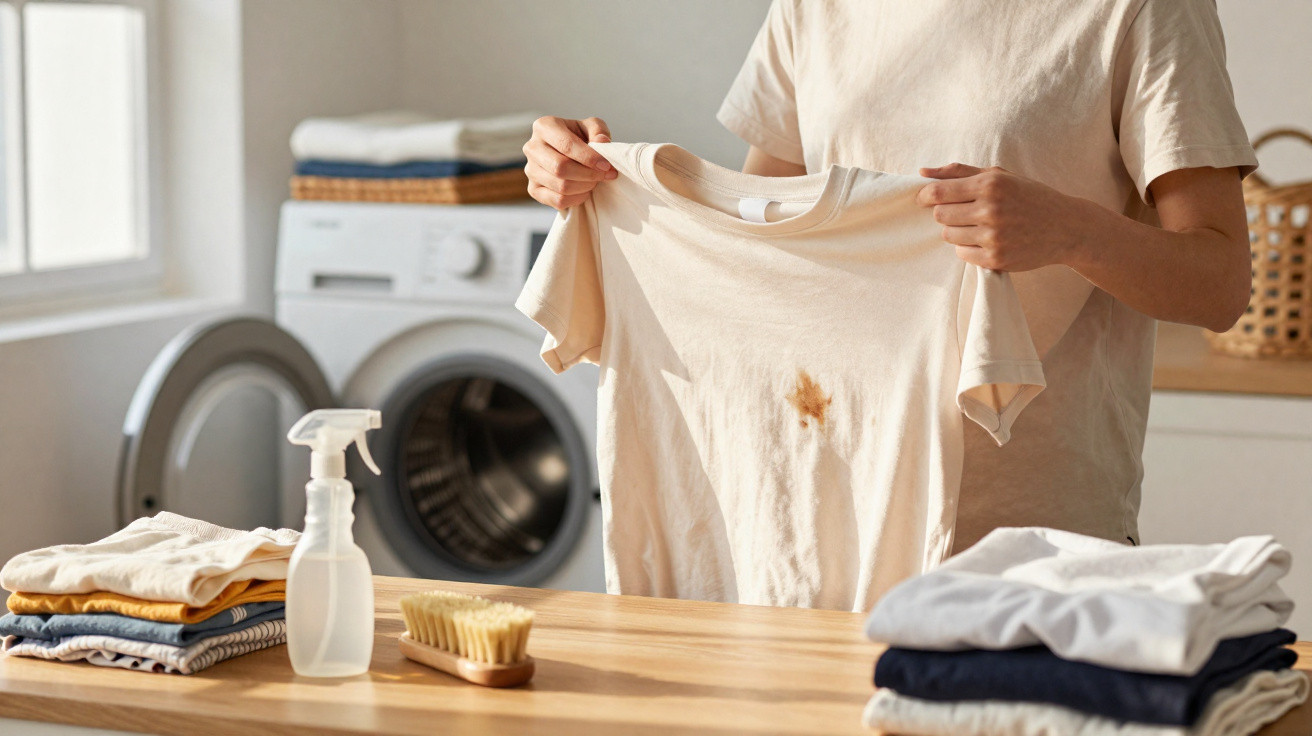
Many people automatically turn T-shirts, jeans and jumpers inside out before putting them in the wash. It sounds like a pro tip, protects prints and colours - yet it often means marks stay stubborn and can even work their way deeper into the fabric. What matters is not the habit itself, but where the grime and stains actually are.
Why so many people turn their clothes inside out before washing
For many, it is a learned reflex from home: sort the laundry, fasten buttons, turn everything inside out - a standard routine in countless households. And the thinking behind it is sensible to begin with.
"If you wash clothes inside out, you protect the visible outer side from friction against the inside of the drum."
The upsides are straightforward:
- Prints, flocked designs and embroidery rub less against the metal drum.
- Dark fabrics wear more slowly and look less faded over time.
- With the inside exposed, detergent reaches sweat, deodorant and cream residue more easily.
Especially with jeans, black hoodies and T-shirts with large prints, this genuinely helps: the "like-new" look lasts longer, and common odour hotspots around the underarms or back can be cleaned more precisely.
That is also where the trap sits: if you apply this technique blindly to every item, you often neglect the area that should really be the priority - the outside, where visible stains tend to be.
When washing inside out ruins the cleaning effect
As soon as the outside shows obvious marks, the benefit can flip into the opposite. In that situation, turning the garment can reduce the wash’s ability to clean.
"Stains need to be directly exposed to the water flow, the detergent solution and mechanical movement - otherwise they remain."
If you turn a visibly dirty item inside out, three things typically happen:
- The stain sits "wrapped" within the layers of fabric and gets less direct contact with moving water.
- Friction happens mainly on areas that are already clean - not where it is actually needed.
- Soil can spread within the fibres instead of fully releasing.
A particularly sneaky detail: after washing, everything smells fresh, and that scent suggests cleanliness. Only once the item dries do edges reappear, or a pale shadow remains. At that point the cycle may have been pleasant for your nose, but inadequate for the fibres.
This is especially troublesome with:
- Grease stains (oil, butter, salad dressing)
- Tomato or curry sauce
- Ground and grass stains on knees or trouser legs
- Make-up and foundation marks on collars and cuffs
All of these cling strongly and react badly to heat. If they are "hidden" on the inside, the stain can set deeper or only partially fade - until you catch it again in good light.
The golden rule: when to wash inside out, and when not to
"A simple rule of thumb: outside dirty - wash right-side out. No visible stains - inside out for protection."
That way your clothes get both protection and proper cleaning. In practical terms:
- Jeans with no stains: turn inside out to protect colour and fabric.
- Black hoodie with no visible marks: inside out, so it stays a deeper black for longer.
- T-shirt with a large print but no stains: inside out as well, to protect the print area.
- Trousers with grass stains on the knee: pre-treat, then wash right-side out so the stain is exposed.
- Blouse with make-up on the collar: treat the collar, then wash right-side out.
There are exceptions. Very delicate prints or thick, raised flocked designs may be safer inside out even when stained - but then the affected area needs especially thorough pre-treatment and the wash programme may need to run a bit more intensively.
How stains actually come out: pre-treat rather than hope
If you simply throw visible stains into the machine and rely on the cycle alone, you waste a lot of potential. Effective stain removal usually works best in three stages.
Step 1: Spot the stain before it disappears into the laundry pile
A quick check when you take clothes off is enough: front, collar, sleeves, knee seams - that is where most stains show up. The sooner you notice them, the easier they are to lift.
Step 2: Dampen the stain and treat it appropriately
Different types of dirt need different help:
- Grease stains: lightly dampen the fabric, apply a drop of washing-up liquid, and gently work it in.
- Protein-based stains (heavy sweat, blood): rinse with cold water first, then use a stain remover - avoid heat at the start.
- Coloured sauces (tomato, curry): apply an enzyme-based stain remover or stain soap, and leave briefly to work.
- Mud and soil: let it dry completely first, brush off, then pre-treat what remains.
- Stubborn odours: sprinkle a little bicarbonate of soda on the affected area, leave it to sit, then wash as normal.
Dwell time matters more than force. Gentle rubbing with your fingers or a soft cloth is enough. Too much pressure roughens fibres and makes clothing look worn sooner.
Step 3: Wash right-side out so the stain is “in the line of fire”
If the outside is affected, it should face outward in the drum. That way the moving water hits the stain directly, the detergent works where the dirt is, and the drum action helps loosen it.
"If you pre-treat first and then wash right-side out, you often avoid needing a whole second wash cycle."
Hold off on the tumble dryer until the stain has genuinely gone. Heat can "bake" residue into the weave, and afterwards it is much harder to remove.
The overlooked variables: temperature, load size, spin speed
Even excellent pre-treatment loses impact if the machine settings are off. A few factors make a big difference:
- Temperature: 30–40 °C is usually enough - higher can harm delicate colours, while too low may not dissolve grease well.
- Load size: overfilling the drum restricts the movement needed to lift stains.
- Spin speed: delicate pieces need a gentler spin; otherwise the outer surface takes unnecessary wear.
- Detergent amount: too much can leave a greyish film; too little will not clean thoroughly.
- Zips and Velcro: close them first to prevent abrasion and micro-scratches on neighbouring textiles.
Good routines start with sorting
If you sort laundry not only by colour and temperature, but also by stain type, you save time and frustration. A brief look at each item is enough.
"A single quick check before something goes into the laundry basket often decides whether it looks truly clean after one wash - or ends up back in the machine."
Useful sorting habits include:
- Set aside heavily soiled items instead of mixing them into a normal wash.
- Check high-friction zones such as collars, underarms and waistbands more critically.
- Put small items with hooks (bras) or hard embellishments into mesh laundry bags.
Build this quick check into everyday life and you will noticeably extend the life of favourite pieces - and you will throw out less simply because something no longer looks "properly clean".
Why smell and appearance often tell different stories
Many people judge wash results mainly by scent: if it smells fresh, it must be clean. In reality, fragrances and fabric softener do not remove stains - they merely mask them.
What visual cleanliness looks like:
- no visible edges or shadows after drying,
- no sticky or slightly rough patches,
- even colour with no darker or lighter blotches.
On light-coloured fabrics, problems often only show up in daylight. If you routinely wash inside out even when the outside is dirty, you will notice this more often - and it is easy to assume the detergent is "weak". In truth, the issue was the automatic inside-out reflex.
In the end, not every long-standing habit deserves to be set in stone. Turning clothes inside out remains useful - but only when used deliberately. If you start checking for stains first and only then decide "inside out or right-side out", you will get far more from every load while also protecting colour, fibres and your patience.



Comments
No comments yet. Be the first to comment!
Leave a Comment