
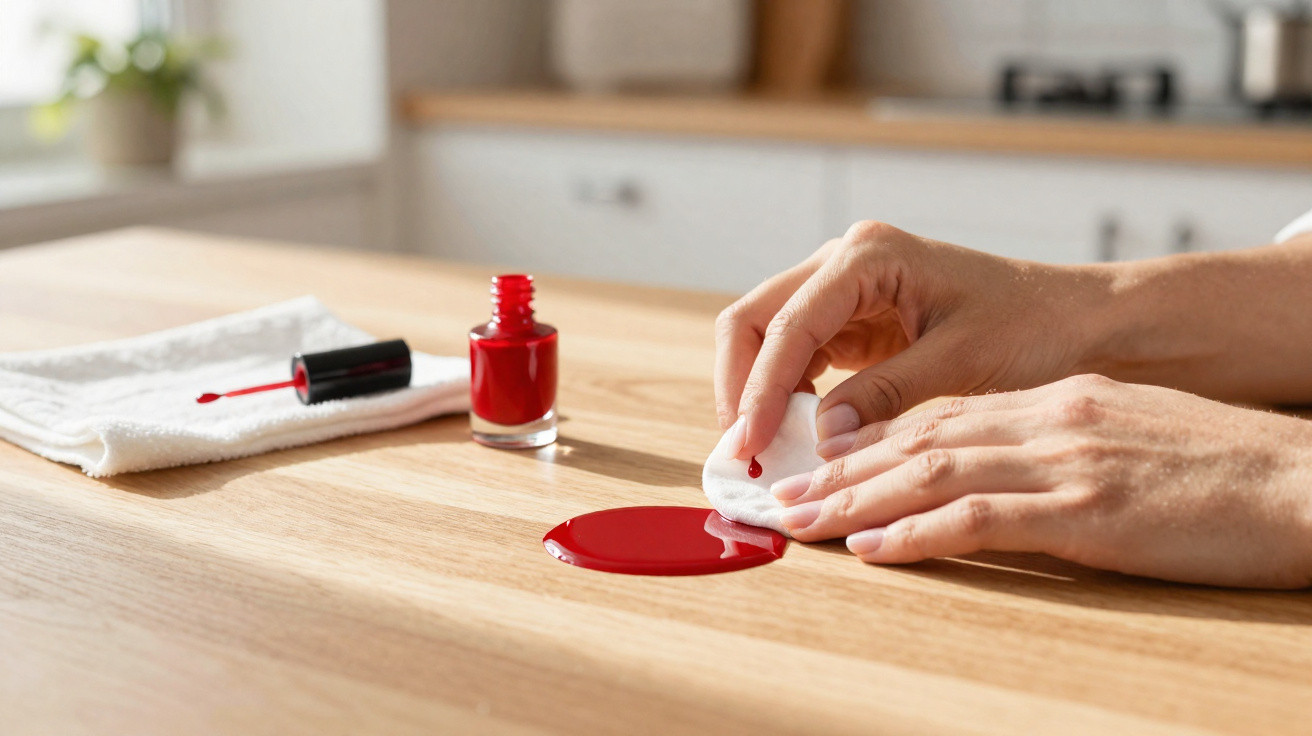
The first scream came from the kitchen. Then that clipped silence where you can feel it: something has gone properly wrong. On the white worktop sits a shimmering, hot-pink puddle of nail varnish-thick as syrup-with little rivulets edging towards the grout line. Next to it, a friend’s hand has frozen mid-air, the bottle having slipped during a frantic phone call. For a beat, everyone just stares. Then comes the panicked grab for kitchen roll, water, anything at all. And that is usually where the real damage starts.
Why nail varnish stains are so tricky
If you’ve never “decorated” an almost-new wooden chest of drawers with a tiny drop of red varnish, it’s easy to underestimate how ruthlessly that shine creeps into every pore. On smooth surfaces it can look harmless-almost like an accent. On fabric or open-grain wood, the very same varnish behaves like a guest who refuses to leave. After all, it’s designed to stick to keratin for days, despite hand-washing, shampoo, washing-up liquid. It’s hardly surprising that laminate isn’t exactly impressed at first.
There are those classic “oops” moments: the bottle tips over during a Netflix night and lands on the sofa; a child’s foot marches straight through a fresh blob on the tiles; a brush slips and produces a perfect splatter pattern across the bathroom mirror. Later, everyone laughs about it-before that, you’re desperately searching “remove nail varnish without damage”. Many people reach for acetone on autopilot because it works so well on nails. Yet, judging by the damage reports insurers see, etched surfaces, discoloured carpets and ruined wood sealants have become almost routine. It’s just that hardly anyone talks about it.
Once you take a second to consider what you’re dealing with, the chaos starts to make a strange kind of sense. Nail varnish is made up of film-formers, resins, colour pigments and plasticisers-built to cure crystal-clear and then stay stubbornly unfazed by friction, water and soap. Strong solvents will soften the varnish, but they often attack the material underneath at the same time. Water can spread the stain and drive it deeper into fibres. A quick wipe smears the pigments like watercolour paint. The trick isn’t to get the varnish off by any means necessary-it’s to separate it from the surface before the surface pays the price.
Practical methods for different surfaces
The first move is always the same: breathe, and stop whatever is about to make it worse. No water, no aggressive scrubbing, no all-purpose cleaner out of habit. On smooth surfaces-tiles, glass, ceramic or stainless steel-you’re usually in the best position. If the varnish is still soft, gently lift it with a piece of card, a paper towel or an old plastic card. Think “pick up” rather than “wipe”, so the spill doesn’t turn into a thin pink film. If it has already dried, a cloth dampened with alcohol often does the job. Isopropyl alcohol or standard disinfectant alcohol works more slowly than acetone, but it’s noticeably kinder to grout and finishes.
A common mistake is treating every surface as if it’s the same. We all know that moment of thinking, “Go on-one hard rub and it’ll be gone.” On wooden tables or parquet, that’s a reliable recipe for dull patches and ugly tide marks. A gentle, layered approach is safer here. Start by carefully lifting the dried varnish with a wooden spatula or a plastic scraper, working bit by bit without scratching the finish. Then, with a soft cloth, tackle the remaining residue in tiny, localised touches using a mild acetone-free nail varnish remover or plain alcohol. Let it sit briefly, then dab-don’t rub. Let’s be honest: nobody does this every day. But that patience can save a lot of money later.
For textiles and carpets, the rules change: don’t spread it-contain it. On carpet, use a spoon to push the spill from the outside in, limiting how much varnish reaches the fibres. If you can, place a white cloth underneath the affected area. Then dab (never soak) with acetone-free nail varnish remover or alcohol so the colour doesn’t bleed downwards. Sometimes, professional carpet cleaning ends up cheaper than trying to “rub it all out somehow” with harsh products. However you look at it, varnish is tougher than cotton.
When it gets delicate: rescue gently instead of scrubbing hard
Some surfaces will show scars from even a single drop of the wrong chemical: lacquered wood, acrylic baths, plastics, matte kitchen fronts. With these, the rule is simple: as little solvent as possible, as much careful lifting as necessary. If the nail varnish is already dry, heat can sometimes act like a key. Set a hairdryer to a low setting and warm the area from a distance until the varnish softens slightly. Then use a wooden stick or an old bank card to lift the edges. Pause, warm it again, and release the next millimetre. It can feel oddly meditative, and it’s surprisingly effective because the surface itself is left undisturbed.
The urge to reach for the strongest product straight away is completely human. When it’s a designer table or a brand-new bath, you want the stain gone in a minute. That’s exactly when most long-term damage happens: dull rings, softened coatings, rough patches that later collect dirt even faster. If you’re not sure, test any cleaner on a hidden spot first-the back of a door, the underside of a worktop, a corner edge. Wait briefly, wipe, and check. It sounds obvious, but it can prevent a 20-second problem becoming a £2,000 one.
Sometimes it takes a few firm lines to quieten the inner cleaning perfectionist.
“Not every mark has to vanish in ten minutes. Some stains come out better in three stages-and then they don’t leave a story on the surface.”
- Start gently: Begin with the mildest approach-lift mechanically, then use alcohol, and only consider stronger solvents right at the end.
- Work precisely: Treat only the stain, not the whole area. Small cotton pads or cotton buds help you stay targeted.
- Build in checks: After each step, let it dry briefly and inspect it in daylight before deciding on the next round.
What’s left once the stain is gone
When the pink shimmer has finally disappeared and the table looks like it used to, something often remains besides a clean surface. You suddenly notice how fragile many everyday materials really are. High-gloss doors, soft-touch lacquers, oiled timber-beautiful, yes, but easily upset when a tiny brush slips. A nail varnish stain becomes a mini lesson in materials: glass likes alcohol, wood hates solvents spread over a wide area, and textiles remember every frantic rub.
It also shifts how you see those relentlessly “perfect home” images in magazines and feeds-no splashes, no dents, no smeared pink on the floor. Real life isn’t like that. There are children experimenting with glitter varnish, shared-flat bathrooms with nowhere to put anything down, and friends’ nights with Prosecco and five open bottles on the coffee table. Once you learn to deal with these marks calmly-and remove them precisely when needed-you take mishaps less personally. The focus moves from “Don’t make a mistake” to “Right, how do we fix this?”
And maybe that’s the quiet benefit of every nail varnish disaster on a surface: your attention shifts away from the flawless façade and towards the process behind it-the patient hand, the test patch in an unseen corner, the moment someone says, “Wait-let’s check before we start scrubbing.” That mindset doesn’t just save floors and tables. It also defuses the small everyday dramas that would otherwise echo for hours. If you’re lucky, all that remains is the faintest shadow-and a story you can laugh about at the next girls’ night.
| Key point | Detail | Benefit for the reader |
|---|---|---|
| Identify the surface | Check the material (wood, glass, textile, plastic) and choose the right approach | Lower risk of permanently damaging the surface while cleaning |
| Gentle methods first | Lift mechanically, use alcohol, keep aggressive solvents as the final step | Cleaner removal without dull rings and discolouration |
| Patience and stages | Work in several passes, letting it dry and checking in between | Better results with less stress and lower repair costs |
FAQ:
- How do I remove nail varnish from wood without ruining the finish? Carefully lift dried varnish with a wooden spatula or plastic card, taking pieces off without scratching. Then work only on the remaining marks with a little alcohol or acetone-free remover on a cotton bud, and wipe the spot dry straight away.
- What should I do if nail varnish drips onto the carpet? Don’t rub. Use a spoon to push it from the outside in. Put a white cloth underneath if possible, then dab with a small amount of alcohol or acetone-free remover. Keep blotting with a clean cloth until no more colour transfers.
- Can I use standard nail varnish remover on my kitchen worktop? Usually fine on stone or ceramic, but be cautious with plastics, laminate and lacquered finishes. Test in a hidden area first and apply very sparingly and only to the stain.
- How do I get nail varnish off glass or mirrors? Pull off fresh varnish with a plastic card. Loosen residue with a cloth dampened with alcohol, leave it for a moment, then wipe without pressure. Glass generally forgives far more than wood or plastic.
- What if the stain is old and completely dry? Go slowly in layers: lift mechanically, soften briefly with a small amount of alcohol, then lift again. If the material starts to change visibly or turns dull, stop-and if in doubt, bring in a professional.

Comments
No comments yet. Be the first to comment!
Leave a Comment