
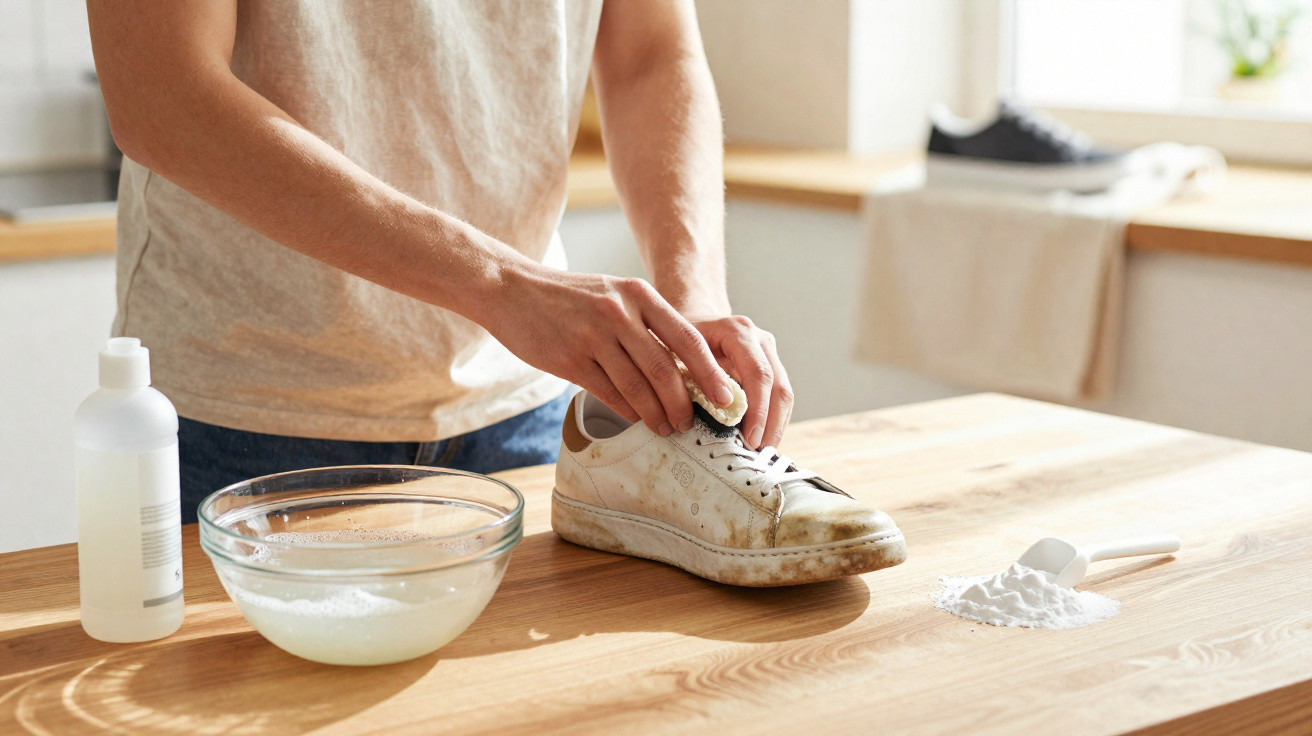
Many people put their trainers through a quick washing-machine cycle and simply hope for the best, even though this can damage their shape, adhesives and colours. A gentler DIY approach is becoming increasingly popular, offering clean, bright sneakers without using bleach or baking soda.
The overlooked trainer-cleaning problem
Trainers have become essential to both everyday wardrobes and fashion. From classic white canvas designs and chunky dad sneakers to vegan-leather pairs worn to work, they collect dirt, urban dust and sweat more quickly than most people manage to wash them.
A washing machine can distort soles, compromise adhesives and cause printed logos to lift. Bleach may give brilliantly white material an odd yellow cast while also harming stitching. Used alone, baking soda can leave behind a powdery residue and may not remove ingrained dirt effectively.
For many sneakers, the real damage comes less from mud than from harsh products and rushed cleaning routines.
Synthetic materials, vinyl sections and combinations of different fabrics also respond differently to ordinary detergents. A cleaner that is suitable for canvas may remove colour from suede or create glossy marks on faux leather.
The surprisingly effective cleaning combination
An increasing number of cleaning professionals suggest an uncomplicated two-stage method using common household products: a bath of mild ammonia and washing-up liquid, followed by an oxygen-based sodium percarbonate treatment. There is no bleach involved and no baking-soda volcano on the kitchen worktop.
Step one: the ammonia and washing-up liquid bath
Although ammonia can sound alarming, a diluted mixture can be highly effective at breaking down greasy marks and city grime. Combined with basic washing-up liquid, it removes sweat, surface debris and dark scuffs without damaging most fabrics.
- Fill a plastic bowl or bucket with roughly 3 litres of lukewarm water.
- Add one measure of mild washing-up liquid.
- Add an equal measure of clear household ammonia.
- Take the laces and insoles out of the trainers.
- Put the shoes and laces into the mixture and soak them for at least one hour.
- Rinse thoroughly with clean water, then allow them to air-dry away from direct heat.
The aim is gentle soaking, not violent scrubbing: let chemistry soften the dirt before your brush even touches the fabric.
This initial bath releases dried-on mud and sweat salts that standard handwashing can leave behind. It also gets the fibres ready for the brightening treatment that comes next.
Safety guidance not to overlook
Ammonia must be handled carefully. Work only in a properly ventilated area, wear basic gloves and never combine it with bleach or chlorine-containing products. Mixing these substances produces toxic gas. Use only the simple washing-up-liquid combination and rinse everything well.
Sodium percarbonate: the gentle brightening stage
After the initial ammonia and soap clean, sodium percarbonate tackles greyed fabric and pale staining. It is the active ingredient in many oxygen laundry boosters. In water above approximately 40°C, it releases oxygen that penetrates fibres and lifts discolouration without stripping them.
Sodium percarbonate behaves like a controlled oxygen bomb inside the fabric, pushing out dullness while leaving the structure intact.
This method is particularly suited to white and very pale trainers, especially canvas pairs that reveal every stain. Unlike more aggressive bleaching products, it generally preserves the original weave and form.
Using sodium percarbonate on trainers
Following the ammonia and washing-up-liquid treatment:
- Fill a clean bowl with hot water that is not boiling, but is comfortably above 40°C.
- Mix in two tablespoons of sodium percarbonate until fully dissolved.
- Place the trainers face down so the uppers are completely submerged, adding the laces as well.
- Leave them for two to four hours, checking from time to time.
- Rinse extremely well so that no residue remains.
- Fill the shoes with paper to retain their shape, then leave them to air-dry.
The material will usually look substantially brighter and will not have the brittle texture that chlorine bleach can sometimes cause. For more persistent marks, use a soft brush dipped in the mixture on toe caps or side panels before the extended soak.
Which treatment suits each material?
| Material | Ammonia + washing-up liquid | Sodium percarbonate |
|---|---|---|
| White canvas | Highly effective on dirt and sweat | Excellent for brightening and lifting stains |
| Coloured fabric | Usually safe where colours are stable | Test first; weak dyes may fade |
| Synthetic leather / vinyl | Only a brief soak or wipe | Use cautiously; spot treatment is preferable |
| Real leather | Use a damp cloth and avoid soaking fully | Not recommended |
| Suede / nubuck | Do not soak; brush when dry instead | Avoid |
Before carrying out any intensive clean, test colourfastness on a concealed section to prevent unwanted results on limited-edition pairs.
Why avoid the washing machine?
Household washing machines spin at speeds that most trainers are not designed to withstand. Over repeated cycles, midsoles can gradually crack, glued sections can loosen and the overall shape can become twisted. Hot programmes may shrink some fabrics and deform overlays.
Hand soaking with carefully chosen products takes longer, but it provides greater control. Water levels can be kept lower, delicate areas can have less exposure and the process can be stopped as soon as the trainers appear sufficiently clean.
Odour removal and drying: the often-missed stages
Smells can remain after a quick wash because bacteria settle deep in the lining and insoles. Taking out the insoles and washing them separately is helpful. Some people add a small amount of sodium percarbonate or oxygen-based powder solely to the insole soak, before rinsing it thoroughly.
How trainers are dried also affects the end result. Leaving shoes on a hot radiator can make them crack or turn yellow. A shaded, well-ventilated spot is more suitable. Packing them with unbleached paper or a clean cotton towel draws moisture from inside, helping to slow musty odours and preventing the toe box from losing its shape.
Cleaning frequency and signs it is time to stop
For trainers worn daily in a city, a deep clean every one to three months will generally keep them looking presentable. Between deep cleans, light spot treatment - with a damp cloth, a soft brush or a quick sole wipe - limits the need for lengthy soaking.
Certain signs indicate that replacement is near, regardless of how well the cleaning mixture works:
- Cracked midsoles that no longer support the foot.
- Split layers that cannot be firmly glued back together.
- Strong odours that return within days of washing.
- Inner linings worn through enough to rub against the skin.
Making trainers last beyond cleaning
This gentle approach does more than make photographs on social media look brighter. It lengthens the useful life of each pair, reducing both waste and replacement spending. Trainers are largely made from plastics and synthetic foams that remain in landfill for decades; making one pair last several additional seasons is more significant than buying a new limited drop.
Alternating between two pairs, choosing removable insoles that can be washed on their own, and keeping footwear dry and free from crushing will all help. Alongside the ammonia and sodium percarbonate method, these habits can make a delicate white trainer a longer-lasting companion rather than a short-term fashion buy.
Comments
No comments yet. Be the first to comment!
Leave a Comment