
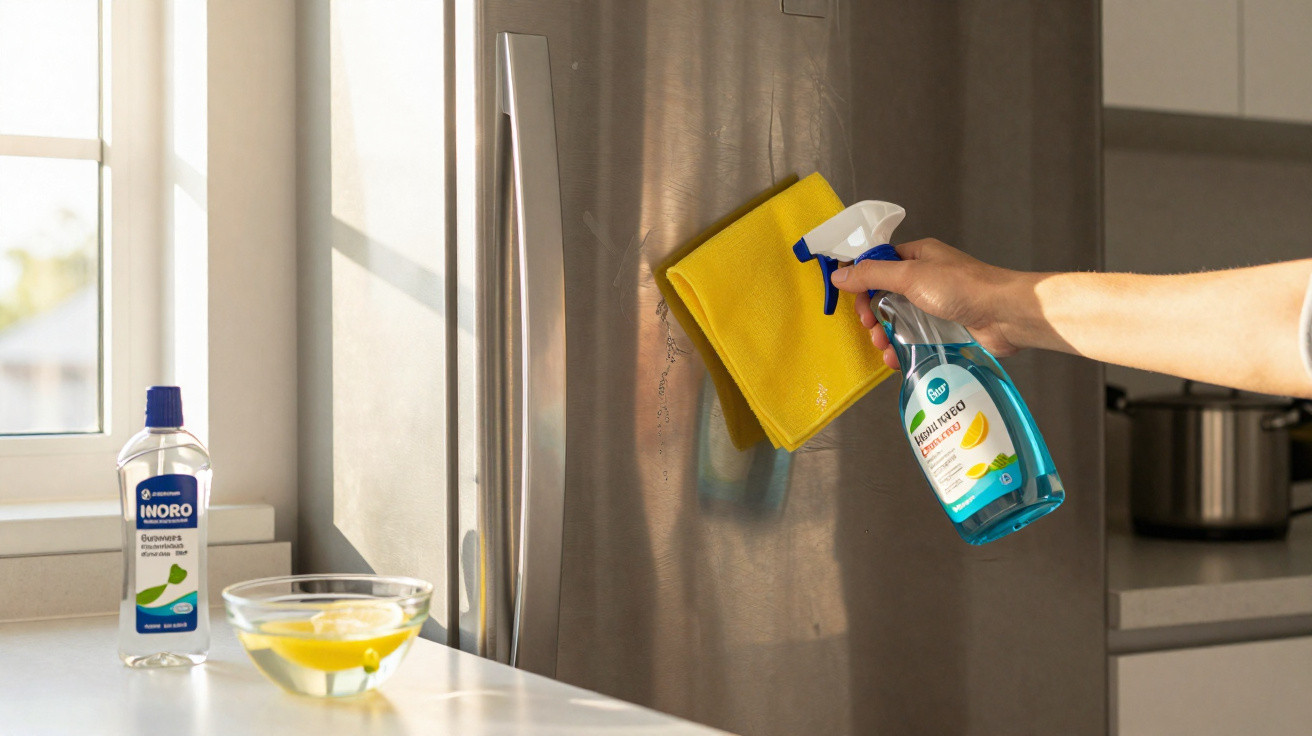
The woman in the video gives the surface a single wipe, the mark vanishes, and the comments fill with heart emojis.
One spray and one pass of the cloth leave the stainless steel looking like a showroom fridge. It almost seems foolish not to give it a go, doesn’t it?
Three weeks later, it is the same kitchen, the same fridge and the same supposed time-saver. Yet the fingerprints now appear darker, while the finish looks… cloudy. In the evening light, the door is no longer glossy: it is streaked, uneven and almost visibly sticky.
This kitchen-cleaning shortcut spreads quickly on TikTok and in group chats. Spray, wipe, repeat. The trouble is that its effect on stainless steel is not visible on the first day.
This “miracle” shortcut that quietly ruins stainless steel
The method could not be easier: take whichever multi-purpose degreaser or glass cleaner is already sitting on the worktop and use it on every shiny item at once. The fridge, oven, dishwasher and even the extractor hood can all be done with one cloth and one product, supposedly finishing the whole kitchen in five minutes.
On video, it seems brilliant. That first wipe genuinely removes the fingerprints, the shine stands out, the camera loves it and viewers applaud the “hack”. But stainless steel does not behave in the same way as glass or laminate.
What looks “clean” at first glance is often a fine, unseen coating left behind on the metal. That residue is precisely where the damage begins.
Imagine a father making dinner while a toddler clings to the fridge handle. Sauces are simmering, pasta boils over and tiny hands leave prints on every surface. Before bedtime, he reaches for the nearest bottle - the one marked “for everything” - and quickly cleans up.
He follows the same routine on most evenings. A month later, pale rings have formed on the fridge door where he always sprays. Within three months, faint scratches start to show in the areas he rubs most firmly. The original shine has become a muted gloss, particularly around the handle.
The same approach is even more damaging on a new stainless-steel oven. Glass cleaners containing ammonia, as well as powerful degreasers, can actually etch the protective chromium oxide layer that makes stainless steel “stainless”. When that layer is damaged, the surface becomes more prone to marks, rust-like spots and lasting discolouration. All because of a product whose label never stated that it was suitable for stainless steel.
The issue is a combination of chemistry and friction. Stainless steel is protected from corrosion by a fine, self-repairing passive layer. Strong alkaline cleaners, ammonia, chlorine and abrasive particles can wear away this protective barrier.
Every “quick wipe” can remove a tiny amount. It is not dramatic enough to spot immediately, but it can gradually roughen the finish or erode the brushed grain. In time, grease and dust settle into micro-scratches, prompting harder scrubbing and creating a damaging cycle.
Many viral cleaning tips also promote homemade mixtures that do not suit metal. A vinegar and bicarbonate of soda paste may be too harsh for certain finishes, particularly when rubbed across the grain. It can resemble a thorough clean while quietly ageing appliances by ten years in two.
The right way to clean stainless steel without wrecking it
The safest method is almost dull: warm water and mild washing-up liquid. Put a few drops in a bowl, use a soft microfibre cloth, and you can deal with 90 % of everyday mess. Wipe gently in the direction of the grain rather than in circles, then dry the surface with a clean cloth to prevent water marks.
For fingerprints, a very small amount of mineral oil or a purpose-made stainless-steel cleaner may help, although only a thin layer is needed. Apply it to the cloth rather than spraying it straight onto the appliance. Tackle small areas at a time, moving with the direction of the brushed metal lines.
Less product, more patience. That is the genuine trick. Stainless-steel surfaces are usually damaged by excessive cleaning rather than too little cleaning.
On a hectic weeknight, no one wants a three-step routine just to clean a fridge door. We have all had that moment when the kitchen resembles a battlefield and the only aim is to make everything disappear within five minutes. That is exactly why shortcuts spread: a neighbour’s suggestion, a reel or a quick message from a friend.
You might try a tip recommending alcohol on kitchen roll, or a few sprays of glass cleaner “just this once”. The first attempt can look remarkable. The surface gleams, fingerprints disappear and you mentally add the method to your personal survival kit.
It is only later that the consequences become apparent. The section you clean most often looks uneven in daylight. Outlines can remain where magnets have been attached for years. On cheaper “stainless look” panels, orange specks or peeling may appear, especially around edges and handles. These signs indicate that the surface finish is actually breaking down.
In practical terms, this shortcut fails because stainless steel does not have a thick protective varnish like some furniture does. The metal itself provides the finish. If that finish is stripped or scratched, there is nothing beneath it that will look better.
Ammonia and bleach may discolour the metal or leave blotchy sections that never match the rest again. Abrasive powders and rough sponges can smooth away the brushed texture, creating dull areas that reflect light oddly. Let’s be honest: nobody really does this every day, but even weekly use can gradually alter an appliance’s appearance.
The irony is that the more fiercely you “deep clean”, the more readily your stainless steel shows grime. Micro-scratches hold grease like Velcro, so smudges develop faster rather than more slowly. What initially seemed like a time-saving hack becomes another task: continually trying to improve a surface that no longer performs like new.
Protecting your stainless steel for the long term
A gentler routine not only prevents damage; it also makes cleaning quicker over time. Begin with a soft microfibre cloth lightly dampened with warm, soapy water. Follow the grain in one direction, without scrubbing back and forth. Then buff the surface dry straight away with a second, dry microfibre cloth.
About once a week, apply a stainless-steel cleaner or a drop of mineral or food-grade oil. Place a pea-sized amount on the cloth and glide it along the grain. This leaves a light protective layer that helps repel fingerprints instead of allowing them to settle into minute scratches.
If previous “hacks” have left old streaks or cloudy patches, proceed slowly in sections and test a small spot near an edge first. Treat it as skincare for metal: gentle, regular and never harsh.
Many people repeat the same minor errors without realising it. They use kitchen roll, which sheds fibres and can be mildly abrasive. They combine vinegar-based sprays with commercial cleaning products without rinsing between applications. Or they scrub across the grain because it seems more effective on a stubborn mark.
It is also easy to forget that not every “stainless” appliance is alike. Lower-priced models sometimes have thin films or coatings designed to resemble stainless steel, but they do not react in the same manner. Strong chemicals can cause these surfaces to blister or peel. A product that worked on an older premium fridge may quietly ruin a new one.
The most considerate choice is to use products that specifically state they are safe for stainless steel and to read the small-print guidance for your appliances. When a manual says “no chlorine, no abrasives”, it is not being overcautious. It is aiming to preserve a finish you have already paid for.
“The damage is rarely dramatic in one go,” explains a professional appliance technician. “It’s the tiny daily shortcuts that turn a €1,200 stainless fridge into a dull, streaky one in under two years.”
To make things easier when you are exhausted or short of time, create a small “stainless station” in the kitchen:
- One soft microfibre cloth reserved solely for stainless steel.
- A small spray bottle containing diluted washing-up liquid and water.
- A stainless-safe product or a small bottle of mineral oil for weekly maintenance.
This means you are less likely to reach for the harsh all-purpose spray intended for tiles or the oven. You do not need to make a decision every evening, because the better option is already waiting on the same shelf.
What actually works vs. what just looks good on camera
Most viral shortcuts are made for the camera rather than for the next five years of your kitchen. In that respect, stainless steel is unforgiving: it retains the memory of what has been done to it. Every decision leaves a mark, even if it is not immediately visible.
The real task is not locating a miracle spray, but accepting that the less spectacular routine delivers the better long-term result. Small, calm actions - a soft cloth, a little soapy water and a quick wipe along the grain before bed - are what work. There is no foam, no fumes and no instant “wow”, only surfaces that remain attractive for longer.
After seeing a fridge door become patchy following months of unsuitable products, those “15-second hacks” begin to look different. You may wonder what the video would show if it returned to the same appliance a year later. You might even find yourself sharing another kind of advice in the group chat: the unglamorous version that genuinely protects your kitchen.
| Key point | Details | Why it matters to readers |
|---|---|---|
| Avoid ammonia and chlorine on stainless steel | Glass cleaners, bleach sprays and some degreasers frequently include ammonia or chlorine, which may remove the protective layer and eventually lead to discolouration or pitting. | It helps you avoid the very products that gradually spoil the finish, keeping appliances looking “new” rather than spotted and cloudy. |
| Always clean along the grain, not in circles | Stainless steel commonly has a visible brushed direction; wiping against it or in circular motions produces cross-scratches that collect light and dirt. | This limits the dull, hazy patches that develop around handles and buttons, while making the surface easier to wipe in future. |
| Use mild soap and microfibre as your default routine | A few drops of washing-up liquid in warm water, paired with a soft microfibre cloth, remove grease, fingerprints and splashes without attacking the metal. | It gives you a straightforward, affordable routine that can be repeated daily without concern about hidden damage or costly repairs later on. |
FAQ
- Can I use vinegar to clean stainless steel? Vinegar can remove mineral marks, but as it is acidic, it should be diluted, used sparingly and rinsed away promptly. Use a soft cloth rather than an abrasive pad, always work with the grain, then rinse and dry thoroughly.
- Why does my stainless-steel fridge look cloudy after cleaning? A cloudy appearance generally results from product residue or micro-scratches caused by harsh cleaners, kitchen roll or scrubbing across the grain. Changing to mild soap, microfibre and a proper stainless-steel cleaner can often restore clarity after several gentle cleans.
- Is olive oil safe for polishing stainless steel? Olive oil may create short-term shine, but it often remains sticky, attracts dust and can turn rancid, causing streaks and odours. A light food-safe mineral oil or dedicated stainless-steel polish is a cleaner option that lasts longer.
- How often should I deep-clean stainless-steel appliances? A quick wipe with soapy water after cooking is usually sufficient, followed by a more complete clean with a stainless-safe product every one to two weeks. The aim is regular use of gentle products, not harsh “deep cleans” that wear out the surface.
- What should I do if my stainless steel already has rust spots? Start by stopping all harsh chemical use and switch to mild soap and water. Next, try a stainless-specific cleaner or a non-scratch cleaning paste, working very gently with the grain. If the spots remain or spread, contact an appliance technician before the damage gets worse.



Comments
No comments yet. Be the first to comment!
Leave a Comment