
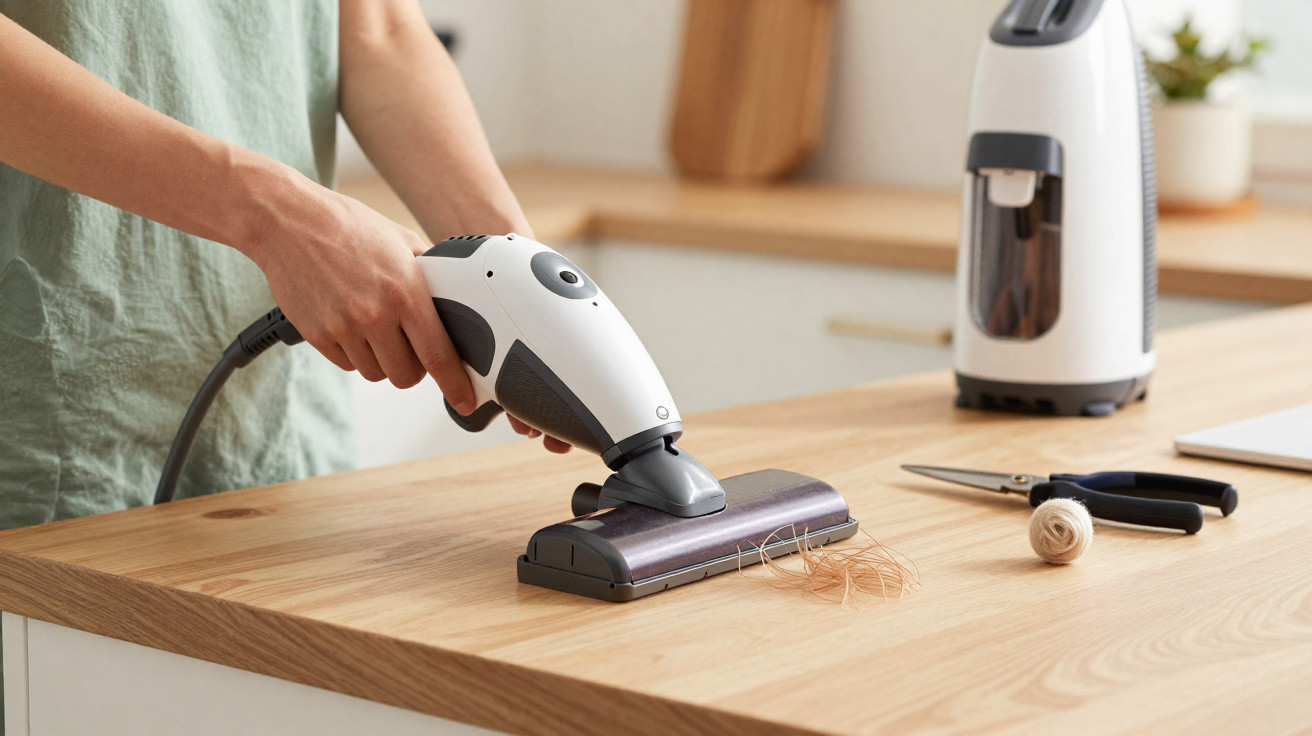
The vacuum cleaner was making all the usual noise, but the crumbs on the rug were not shifting. You know that small surge of annoyance when you run the brush over the same clump of hair once, twice, then three times – and nothing happens? The brush kept rotating and the motor kept roaring, but the dust remained firmly where it was, as though it had been stuck to the fibres. My friend sighed, turned the vacuum over, and we both looked at the grimy rotating brush, crammed with hair, threads and fluff like a tiny felted creature. “I think it’s dead,” she said. She then disappeared to her sewing box and returned with a tool I had not seen since school sewing lessons: a seam ripper.
The difference was almost immediate.
The unusual little tool that revives vacuum cleaners
Watching someone tackle a vacuum cleaner brush with a seam ripper for the first time can seem slightly strange. A small, delicate sewing tool versus a solid mass of plastic and dust? But it slips between wrapped hair with a precision that scissors rarely achieve. Turn the vacuum head over, secure the brush so it cannot rotate, then let the ripper’s sharp hook carry out its careful work.
With each stroke, it slices through long hairs, loose threads from socks, pieces of ribbon and carpet fibres.
Before long, a layer of debris builds up beneath the brush: a mildly revolting yet strangely satisfying heap. It is rather like removing a winter coat the vacuum never wanted. The bristles begin to emerge again, more visible, evenly spaced and lighter. The rotating bar, previously encased in lint, suddenly looks like a working mechanical part once more.
Wipe it down, pull off any final stubborn hairs by hand, and turn the brush with your fingers. It should spin freely: clean and ready to use.
This is generally when you place the vacuum back on the floor and cautiously try it on the carpet. The noise may not alter greatly, but the sensation through the handle does. You can feel the brush gripping slightly, catching the fibres and picking up small crumbs in one pass. The suction feels more powerful and, in a sense, it is. A blocked brush restricts airflow, collects less dirt and makes the motor work harder for poorer results. Releasing the brush with a seam ripper simply restores the machine’s original airflow.
A very small tool can make a substantial difference.
How to use a seam ripper to rescue a vacuum cleaner brush
The technique is almost absurdly straightforward. Unplug the vacuum cleaner, remove the brush head, and turn it upside down, like a small injured robot on an operating table. You will see the main rotating bar, often covered in a greyish layer of hair. Take the seam ripper and slide its pointed end beneath the tangle, keeping it parallel with the bar.
Next, pull gently, much as you would when unpicking a stitched seam.
Tackle it in small sections and do not hurry. Make a short cut with the blade, allow the hair to separate, then pull it away in clumps with your fingers. Short hairs and fibres may require a second pass. Rotate the brush as you work, using the ripper’s hook to pull out material lodged in the corners.
If your vacuum has an exposed belt beside the brush, take care not to score it with the blade.
It can be tempting to push hard and cut deeply in order to finish faster. That is when damage can occur, particularly with softer plastic brushes or models with narrow rubber edges. Let your sense of touch guide you: if you encounter resistance that is more than hair, ease off. Remember the areas at the sides too, where dust can form compact rings around the supports, almost like miniature lint bracelets.
This is where the seam ripper really outperforms scissors or knives.
There is a reassuring logic to the action. A seam ripper was made to release what has become caught and to open what has been closed. It serves precisely that purpose on a vacuum cleaner brush. You are not transforming cleaning; you are simply using a controlled, accurate movement rather than struggling blindly with kitchen scissors.
The outcome is less irritation, fewer scratched components and a brush that can function freely again.
“Honestly, I thought my vacuum had lost half its power,” admits Léa, a dog owner who vacuums almost every day. “I changed the bag, cleaned the filters, even thought about buying a new model. One evening, my sister handed me a seam ripper and said: ‘Try this on the brush.’ Ten minutes later, it sucked like new. I felt both relieved and slightly stupid.”
- Unplug before you start
Electric shocks and moving parts make poor cleaning companions. - Cut lengthways along the brush
Short, measured cuts are safer than long, forceful ones. - Inspect the sides and corners
Compacted dust in these areas can quietly reduce suction. - Pair it with a quick filter inspection
A clean brush + a clean filter = almost full factory power. - Repeat every few weeks if you have pets or long hair
Let’s be honest: nobody really does this every single day.
When a sewing tool changes your view of household chores
Giving a dusty brush ten minutes of attention with a seam ripper does more than simply “clean the vacuum”. It changes your relationship with this loud, mildly irritating appliance. Rather than blaming the manufacturer, the model or planned obsolescence, you can suddenly see the reason for its reduced performance.
You realise that much of the issue was simply wound around that bar: your own hair, your pets’ fur and the remnants of everyday life.
There is also a modest pleasure in using a tool normally kept for sewing to rescue an appliance that costs ten, twenty or sometimes thirty times more. It is a simple, low-tech action, yet it can have a tangible impact on both your money and the lifespan of the machine. The next time your vacuum appears weak, you will have a new instinct: turn it over, examine the brush and reach for that small red-tipped tool.
You may even lend it to a neighbour and see their response when they spot the pile of hair on the floor before and after.
Some people may call it nothing more than a cleaning tip. But straightforward tricks like this often spread fastest, from chats in hallways to social media threads, because they offer something uncommon: a fast, visible and almost instant result. There is no product to purchase and no technical knowledge needed, only a small wrist movement and a tool many people already have at the bottom of a sewing box.
Once you have seen a seam ripper restore the suction of a tired vacuum cleaner, it is difficult to return to doing things differently.
| Key point | Detail | Value for the reader |
|---|---|---|
| Using a seam ripper on the brush | Slide the blade beneath tangled hair and cut in small sections along the rotating bar | Quickly restores suction power without purchasing a new vacuum cleaner |
| Targeting hidden blockage zones | Clean the sides, corners and dust rings around supports and belts | Improves airflow and places less strain on the motor |
| Regular, gentle maintenance | Repeat every few weeks, particularly with pets or long hair, using light pressure | Extends the appliance’s lifespan and keeps cleaning effective |
FAQ:
- Question 1 Can a seam ripper damage my vacuum cleaner brush?
When used with gentle pressure and short strokes, this is very unlikely. Do not press hard against plastic components or the belt area.- Question 2 How often should I clean the brush with a seam ripper?
If you have long hair or pets, every 2–4 weeks is ideal. For everyone else, once every couple of months is generally sufficient.- Question 3 Will this trick really restore suction power?
Where the brush is severely clogged, the improvement is often immediate. For the best outcome, combine it with a quick filter clean.- Question 4 Can I just use scissors or a knife instead?
You can, but they are less precise and more cumbersome. A seam ripper gets beneath hair more easily and lowers the risk of cutting bristles or belts.- Question 5 What if my vacuum brush doesn’t rotate anymore?
Begin by thoroughly cleaning it with the seam ripper. If it still will not move, the cause could be a broken belt or motor, which may require professional repair.

Comments
No comments yet. Be the first to comment!
Leave a Comment